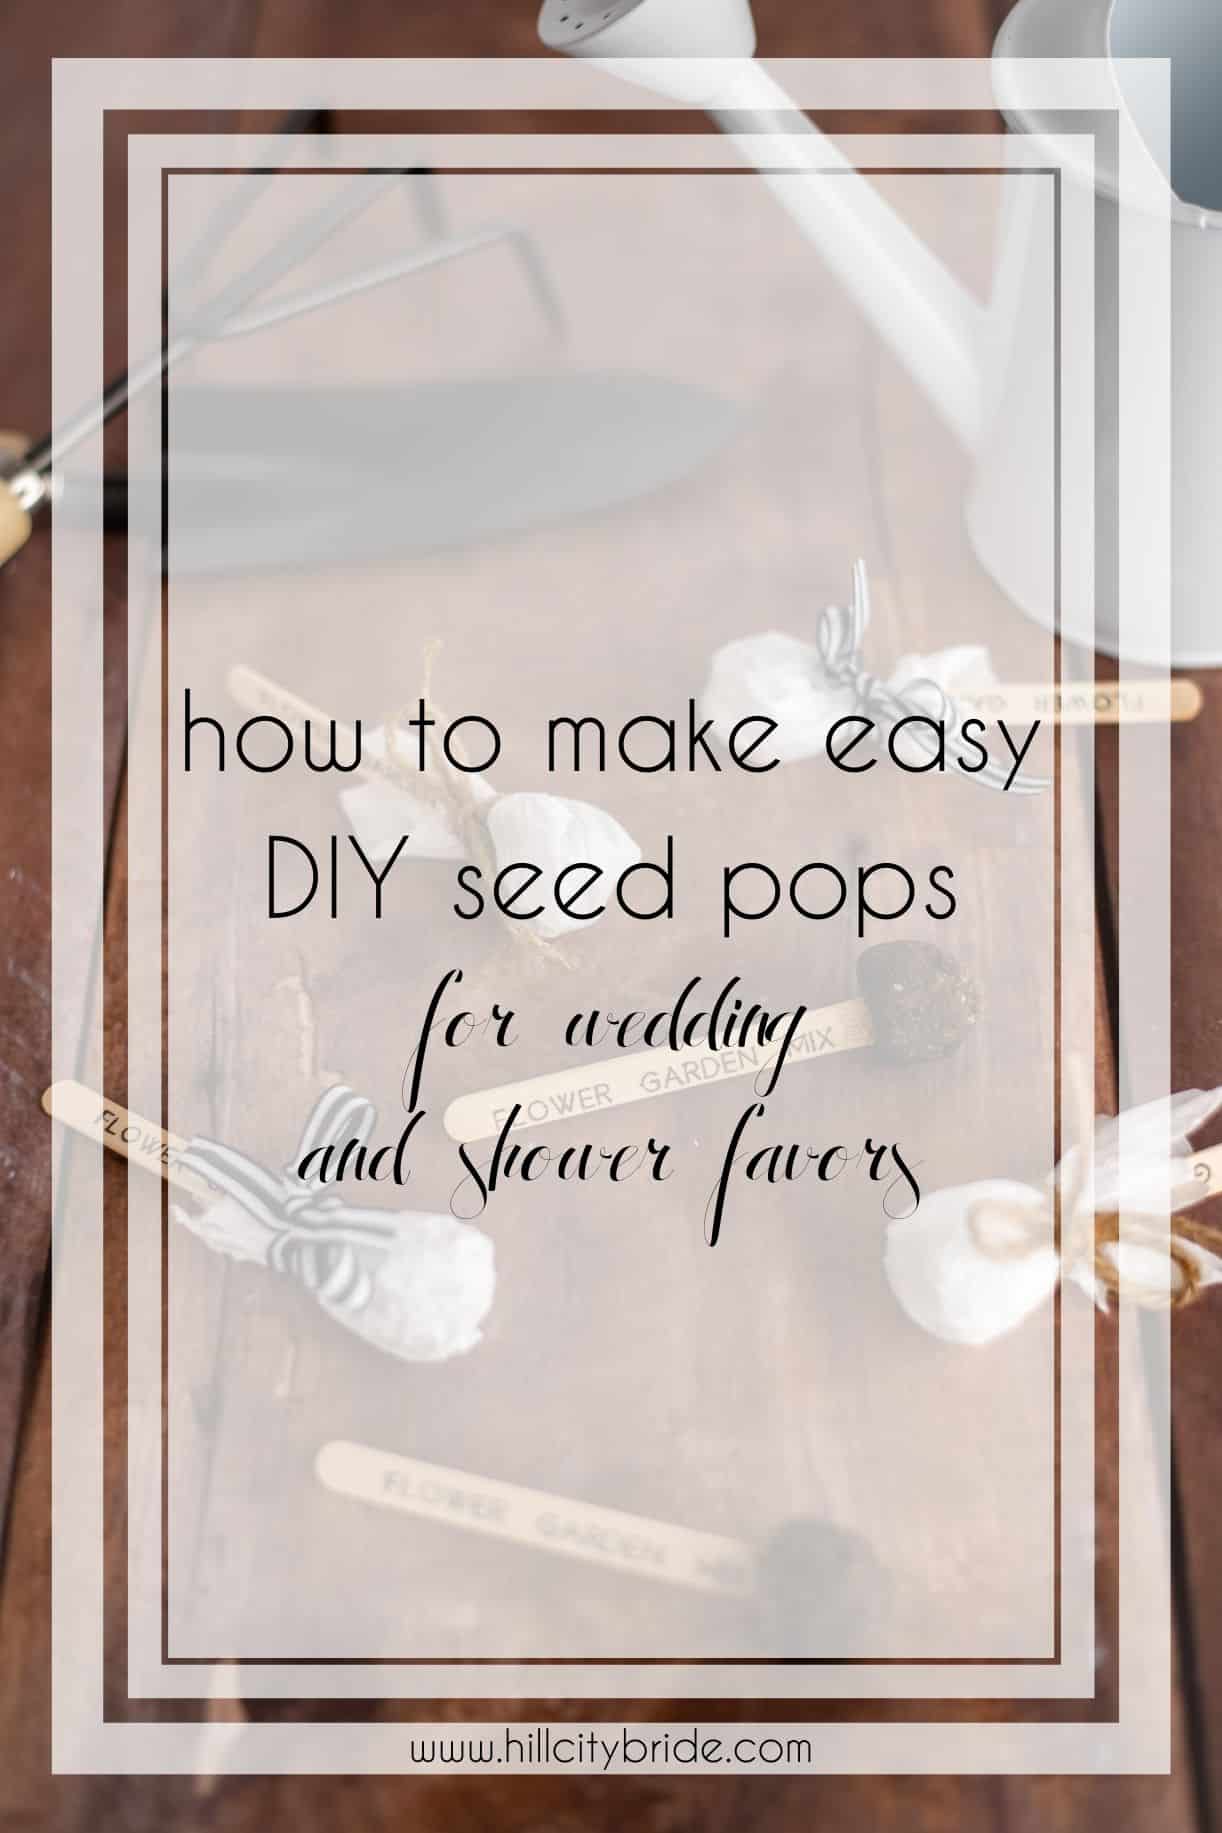
Spring is here, and that means the earth is back to blooming again! Whether you’re hosting a shower or wedding, making our DIY seed pops is a fun way to involve your guests in the season. You can use any kind of plant for your seed bombs—wildflowers or herbs. So. learn how to plant seed pops and give your guests something fabulous with our DIY seed bomb favors.
What do seed bombs do?
Great question! Our wildflower seed pops are designed to be given as an adorable shower or wedding favor. Then, your guests can take the pops home and plant them!
They’re such a cute way to incorporate growth and sustainability into your big day. Additionally, you could also give your guests a pot to plant the DIY seed pops in.
Here are a few common questions about DIY seed pops:
- Do seed bombs actually work? The answer is yes! One key to set your guests up for success is to add an instruction tag to the pop, which would vary according to seed type. Just look at the back of your seed packet to determine the best way to plant them. It will also say how much water and light they need. Therefore, there’s no reason to wonder anymore, “Do seed bombs really work?” Making seed bombs at home can be really fun!
- Can you plant seed bombs in a pot? Again, yes! Of course, if you use large seeds (not recommended for this unless you just use 1-2 per pop), that may vary. A pot is a great way to start your seeds, depending on the type. Learning how to plant seed bombs is fairly simple, and putting seed bombs in pots is a great choice.
- What do seed bombs do? Our homemade seed bombs not only make adorable favors, but they are a fun project! Whether you are the one making or planting them, it’s a fabulous activity. They’re a great way to get a miniature garden started, too. When you put them in soil and give them the right water and light, you can see the seeds grow into plants. You can decide how to use seed bombs as favors and gifts.
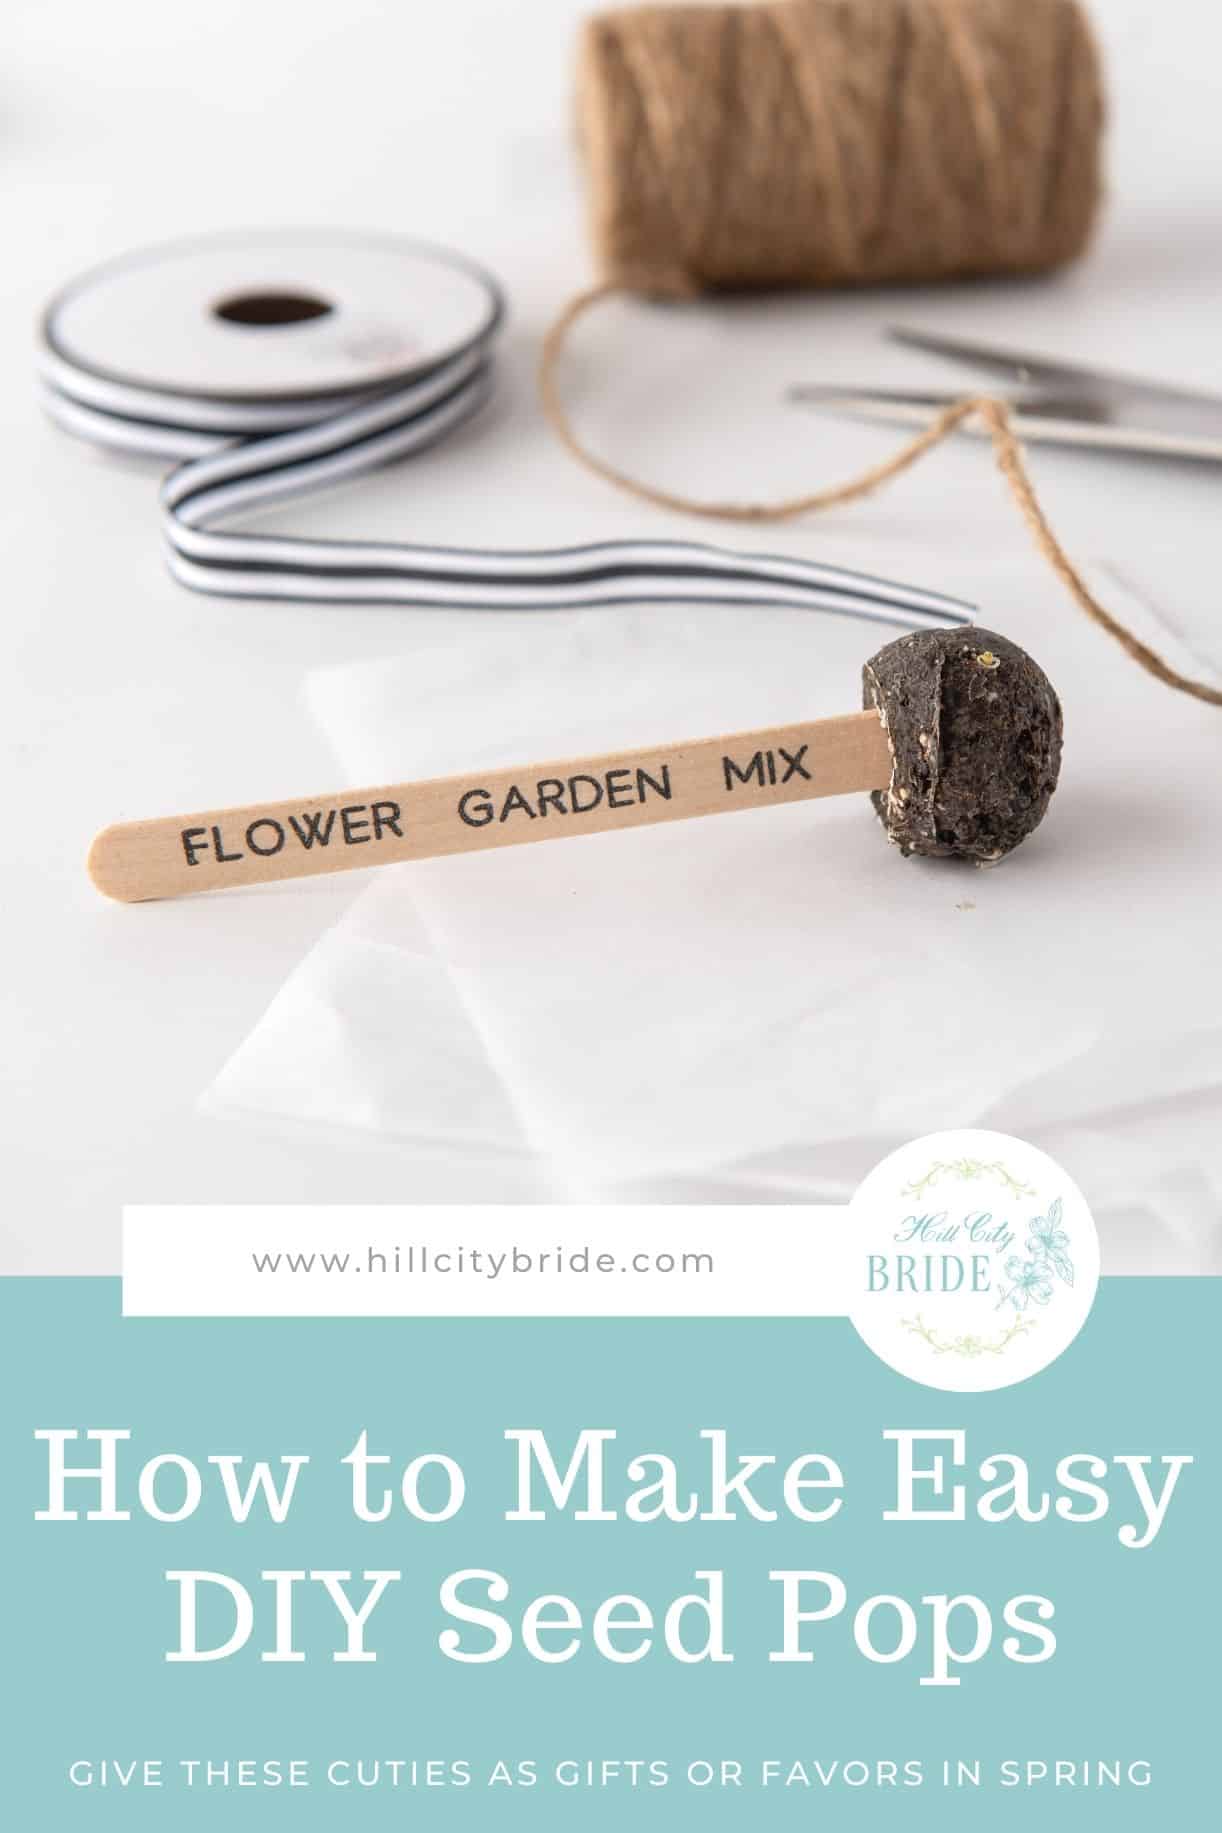
DIY Seed Bomb Favors with Wildflowers
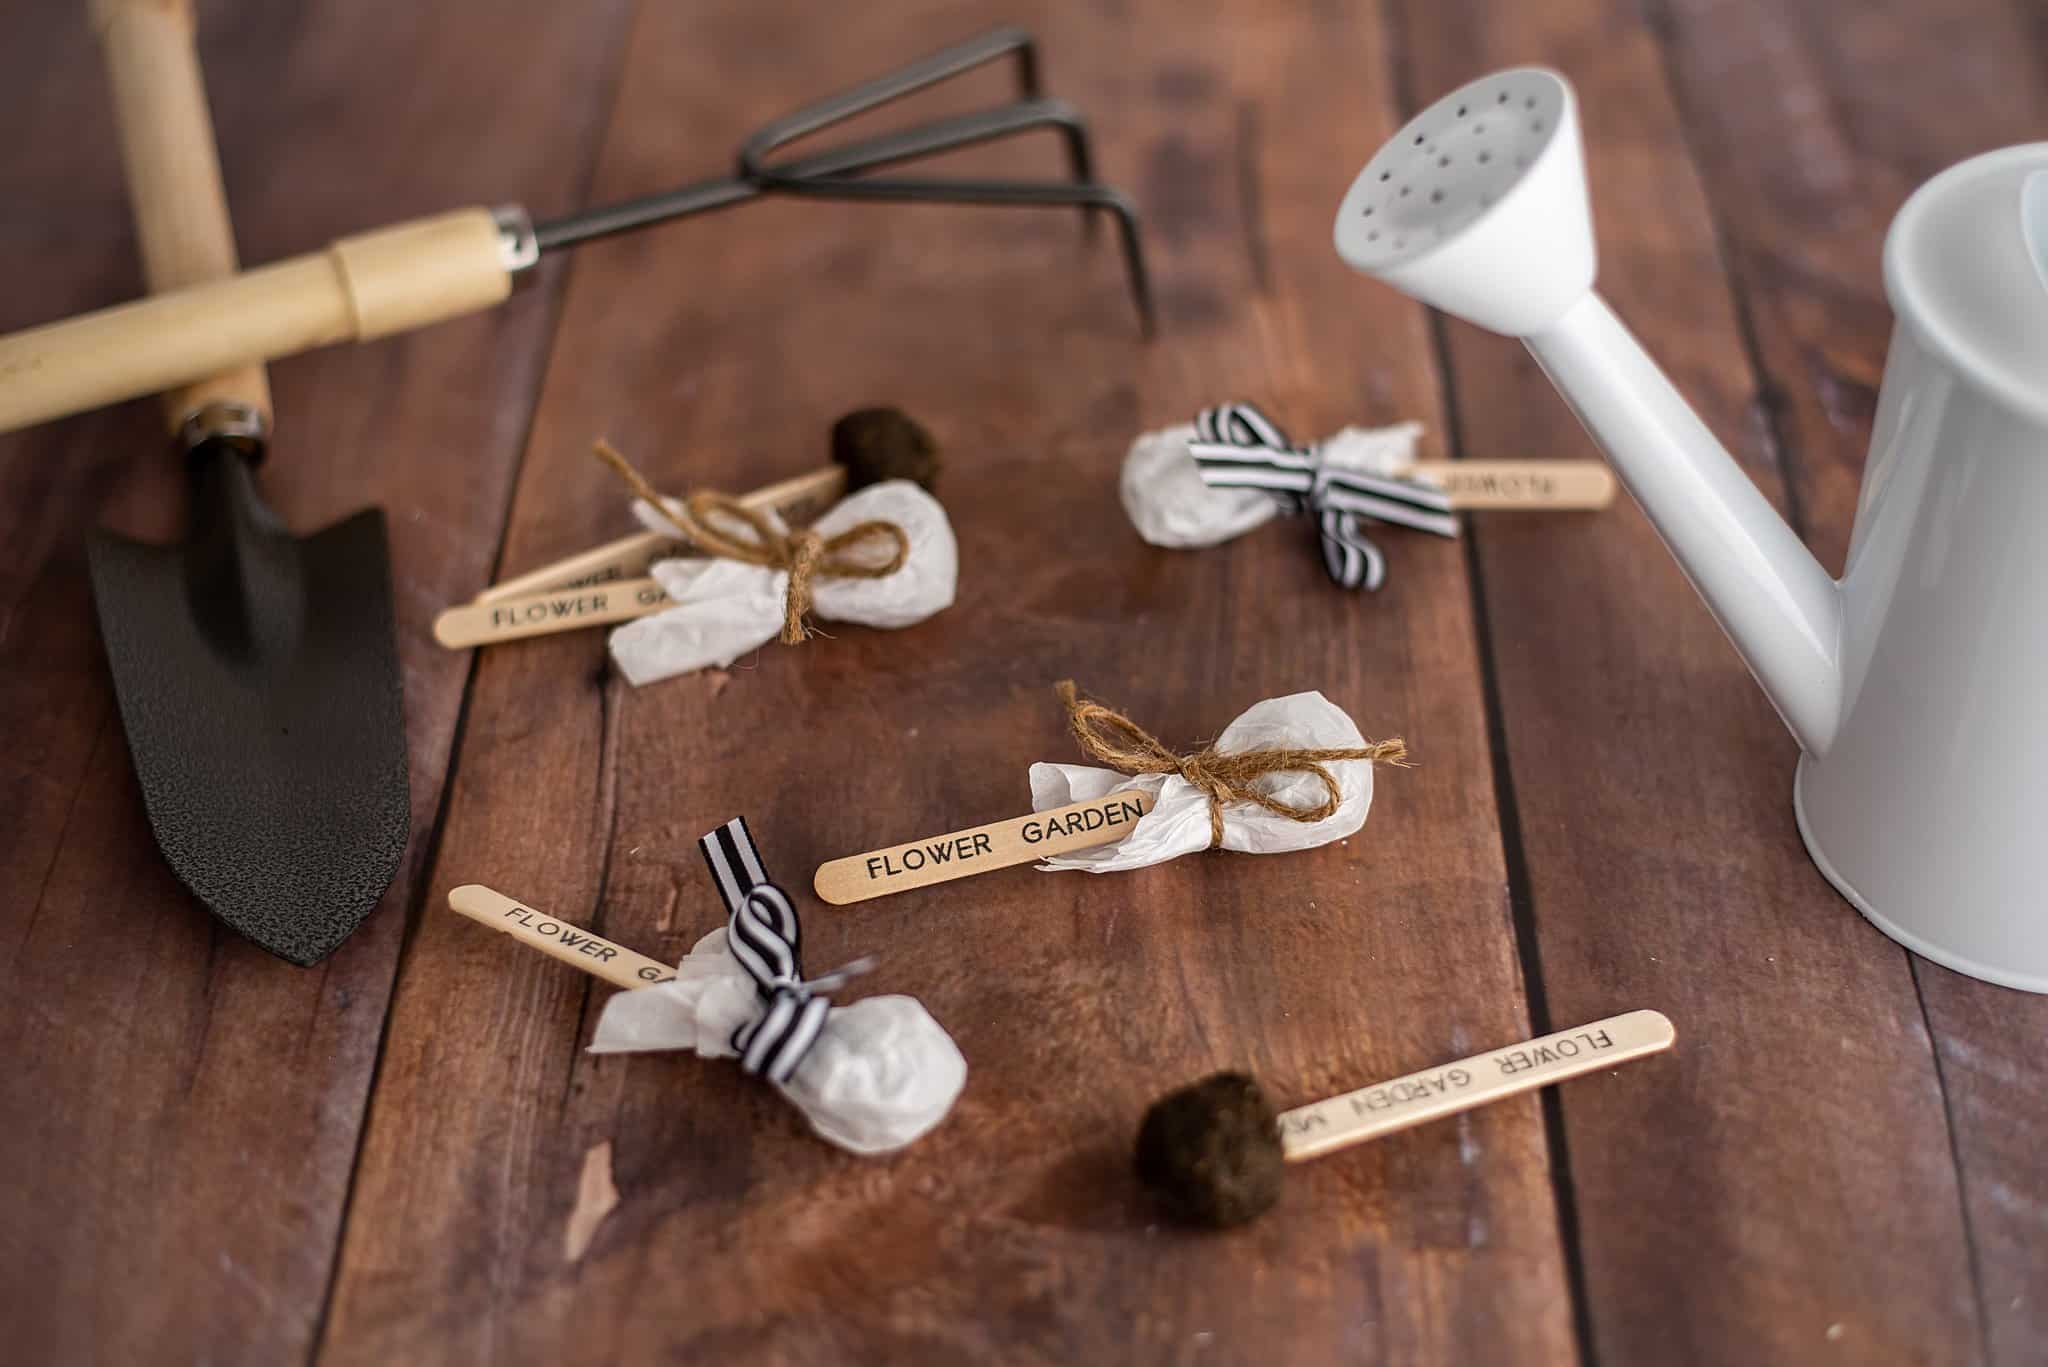
- Each seed bombs recipe makes 6 pops, depending on mold size. This is a seed bombs without blender recipe as it can be easily mixed by hand.
- Prep time: 20 minutes
- Drying time: 24-48 hours

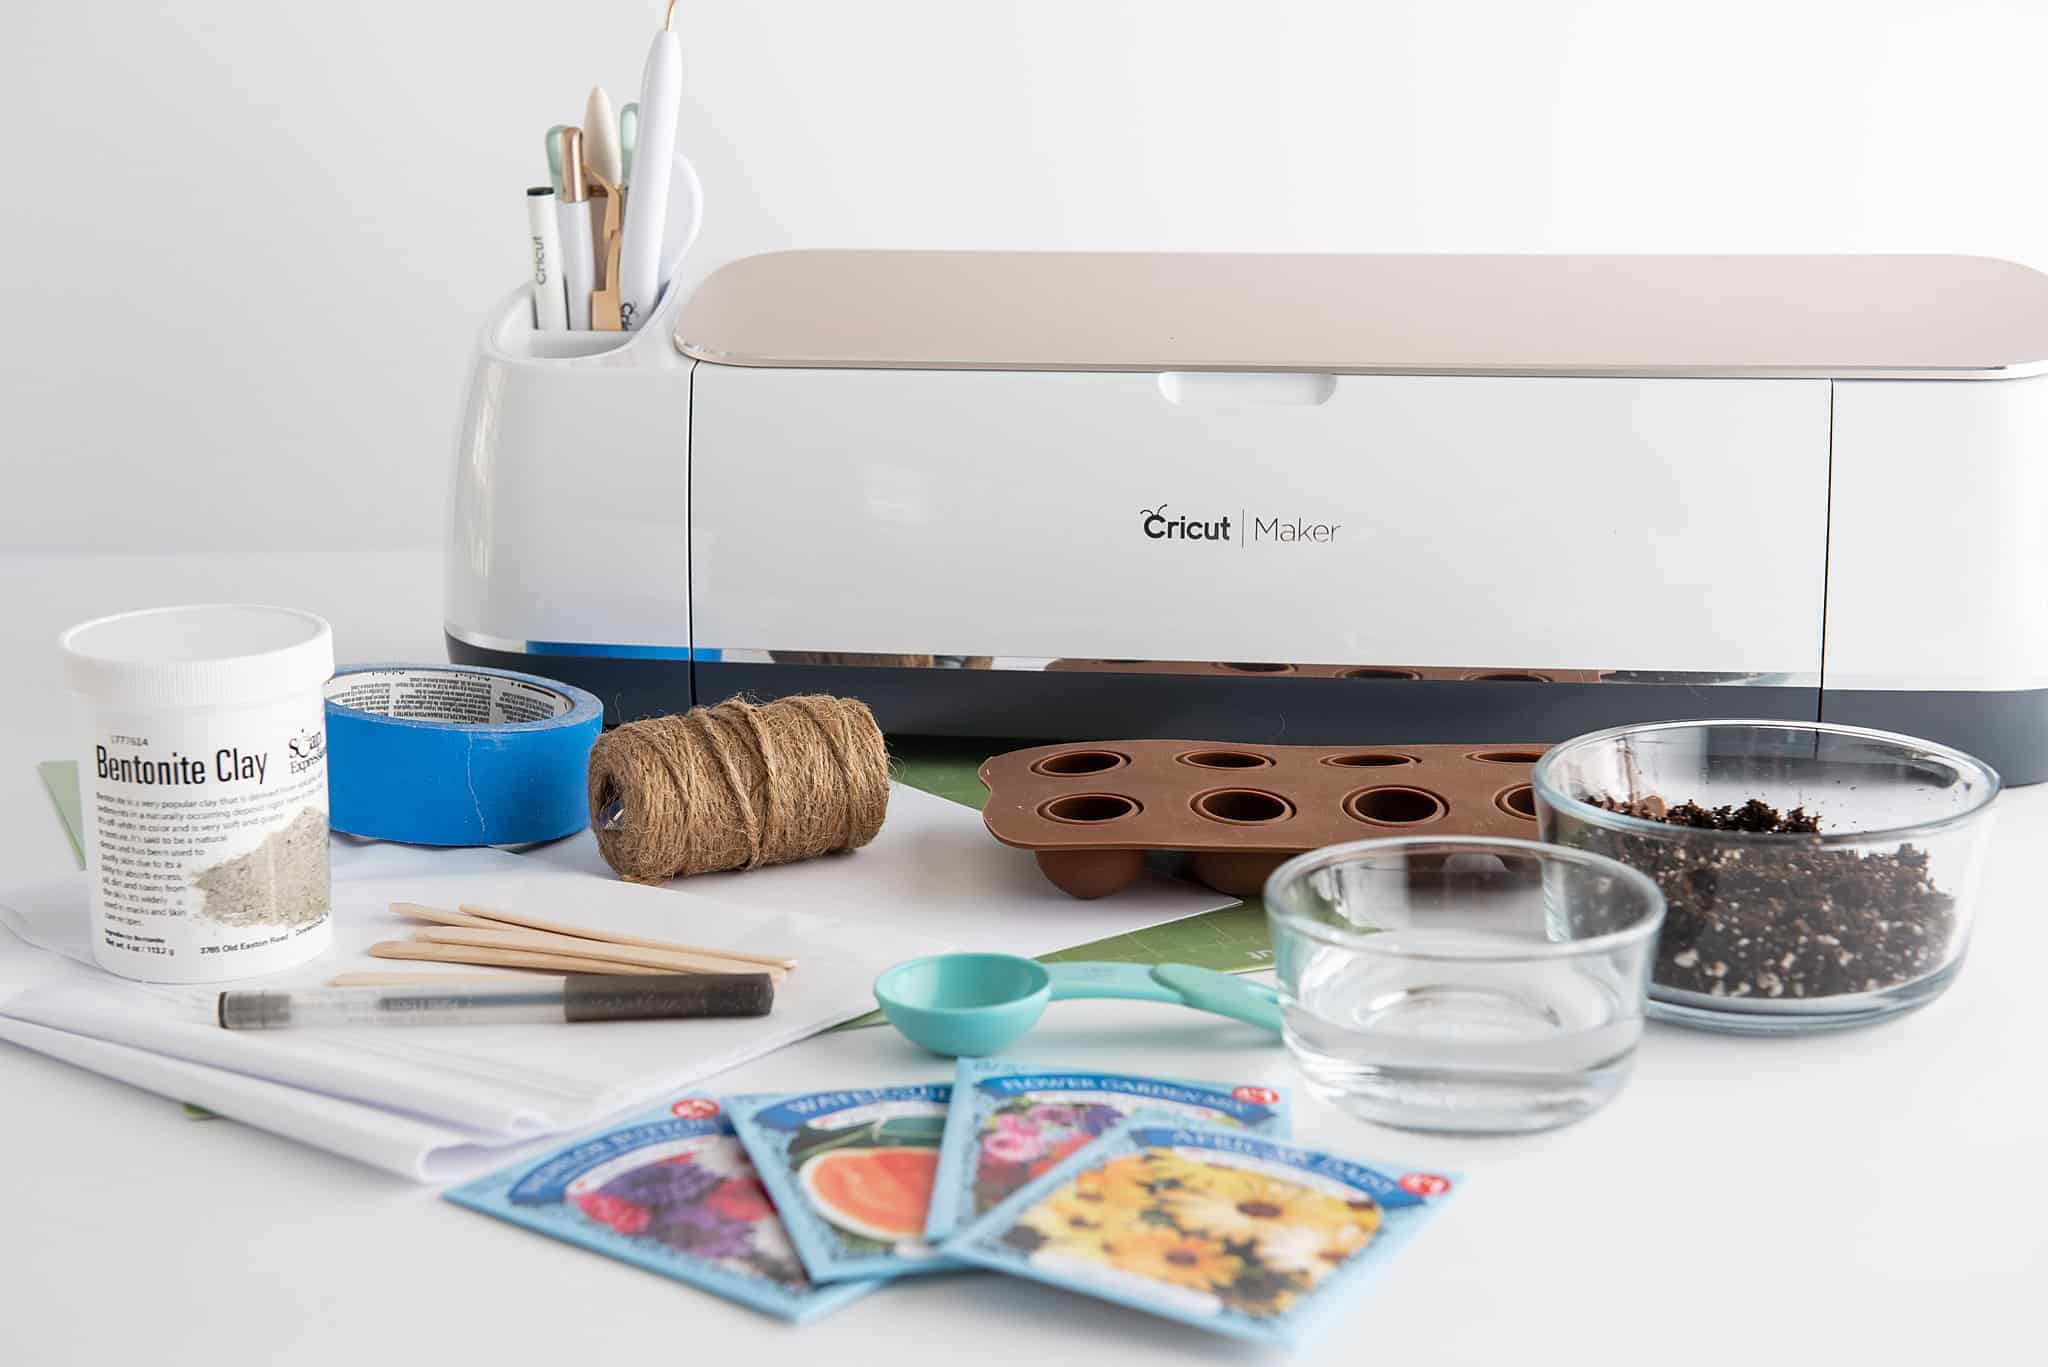
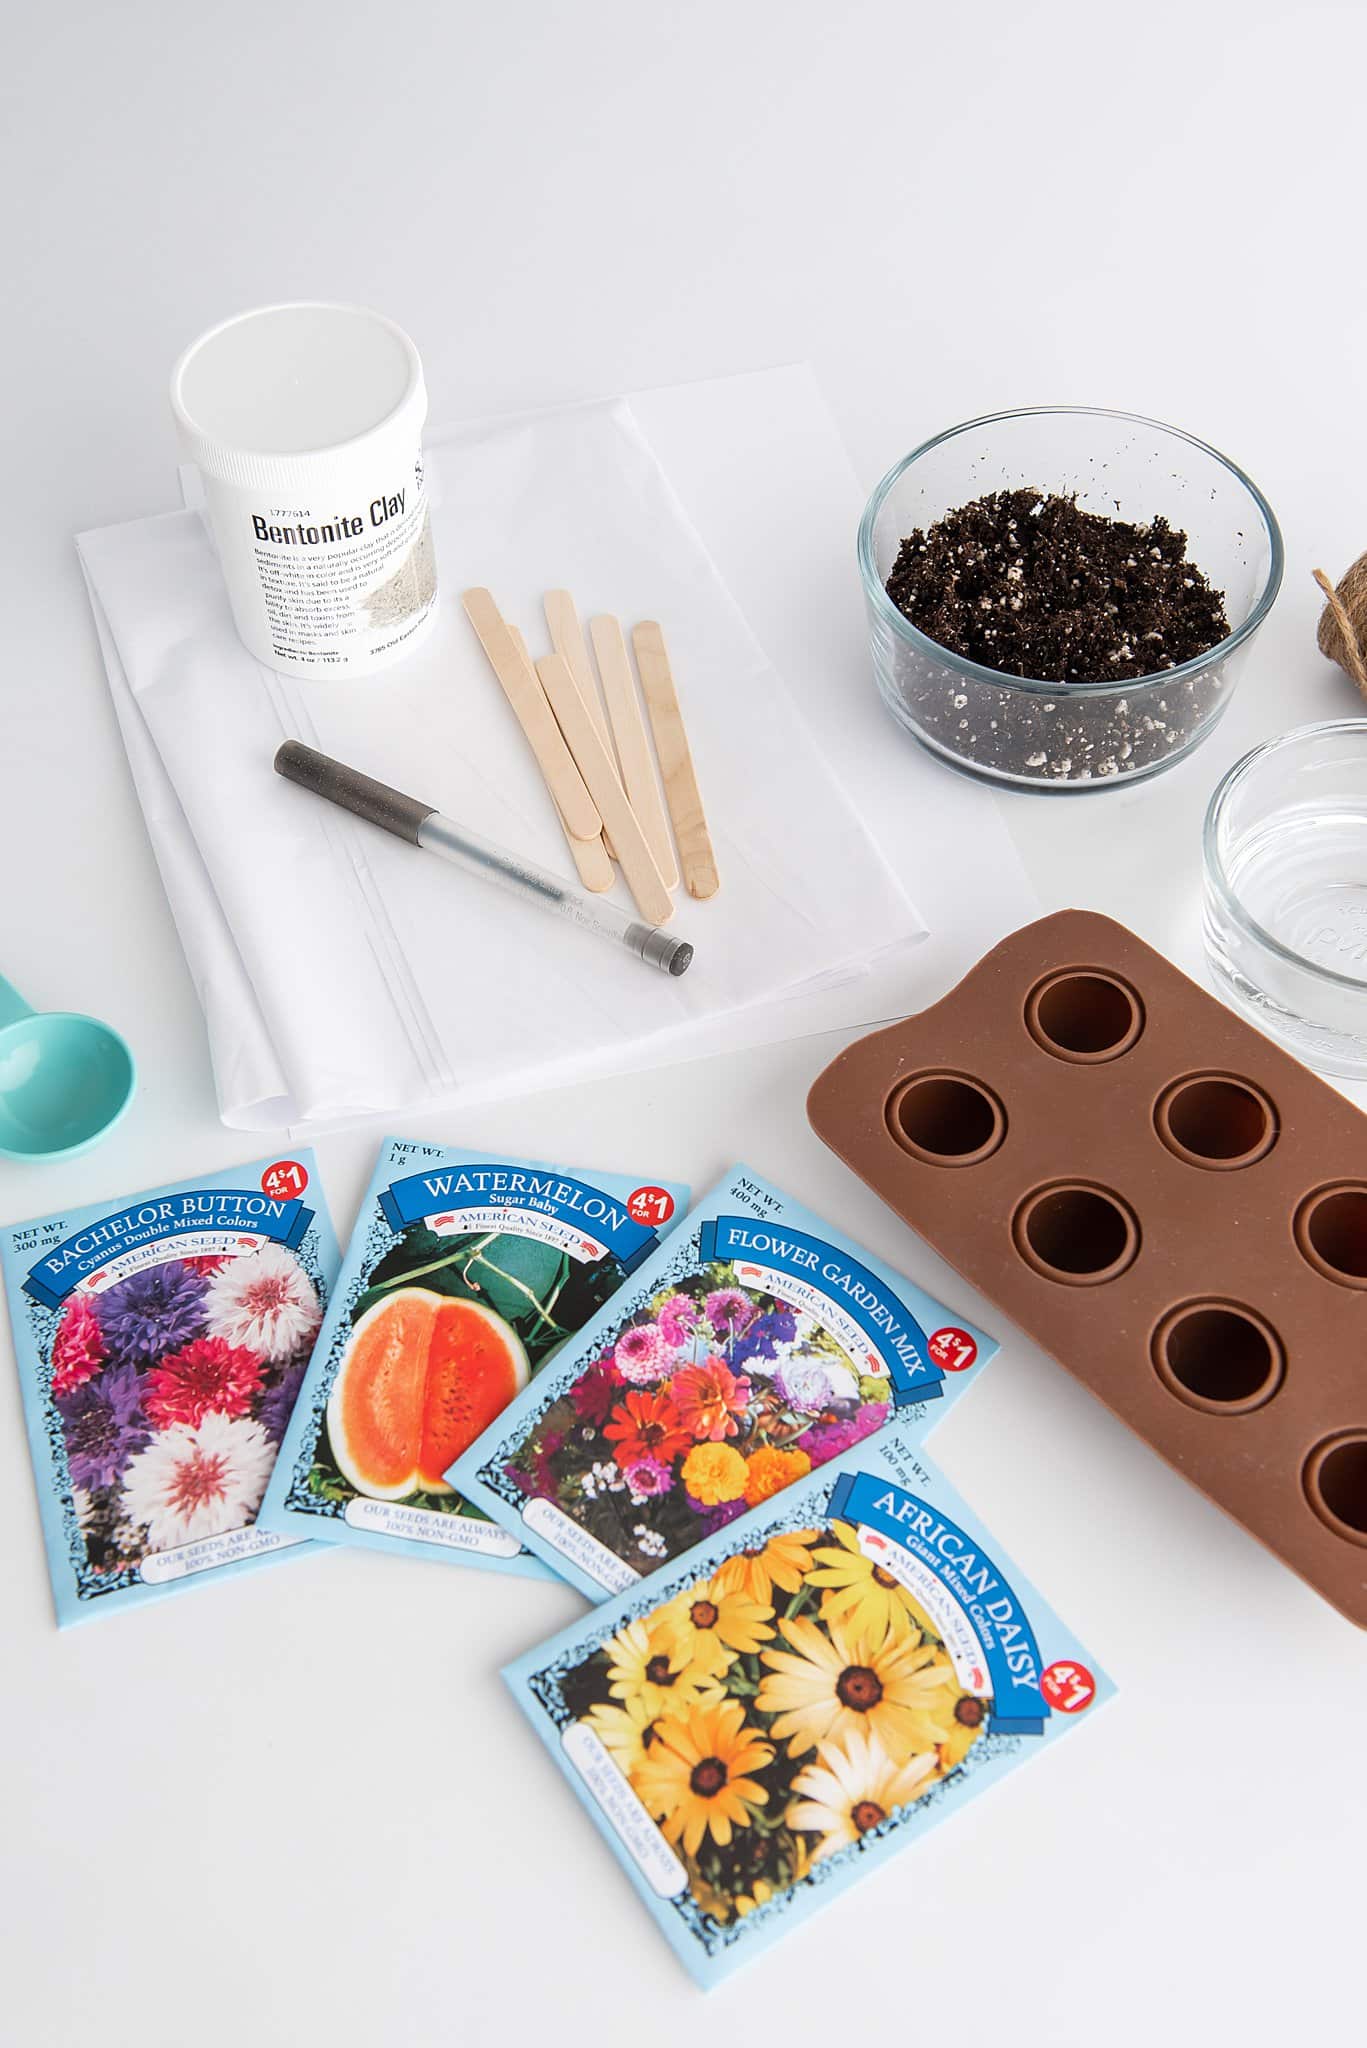
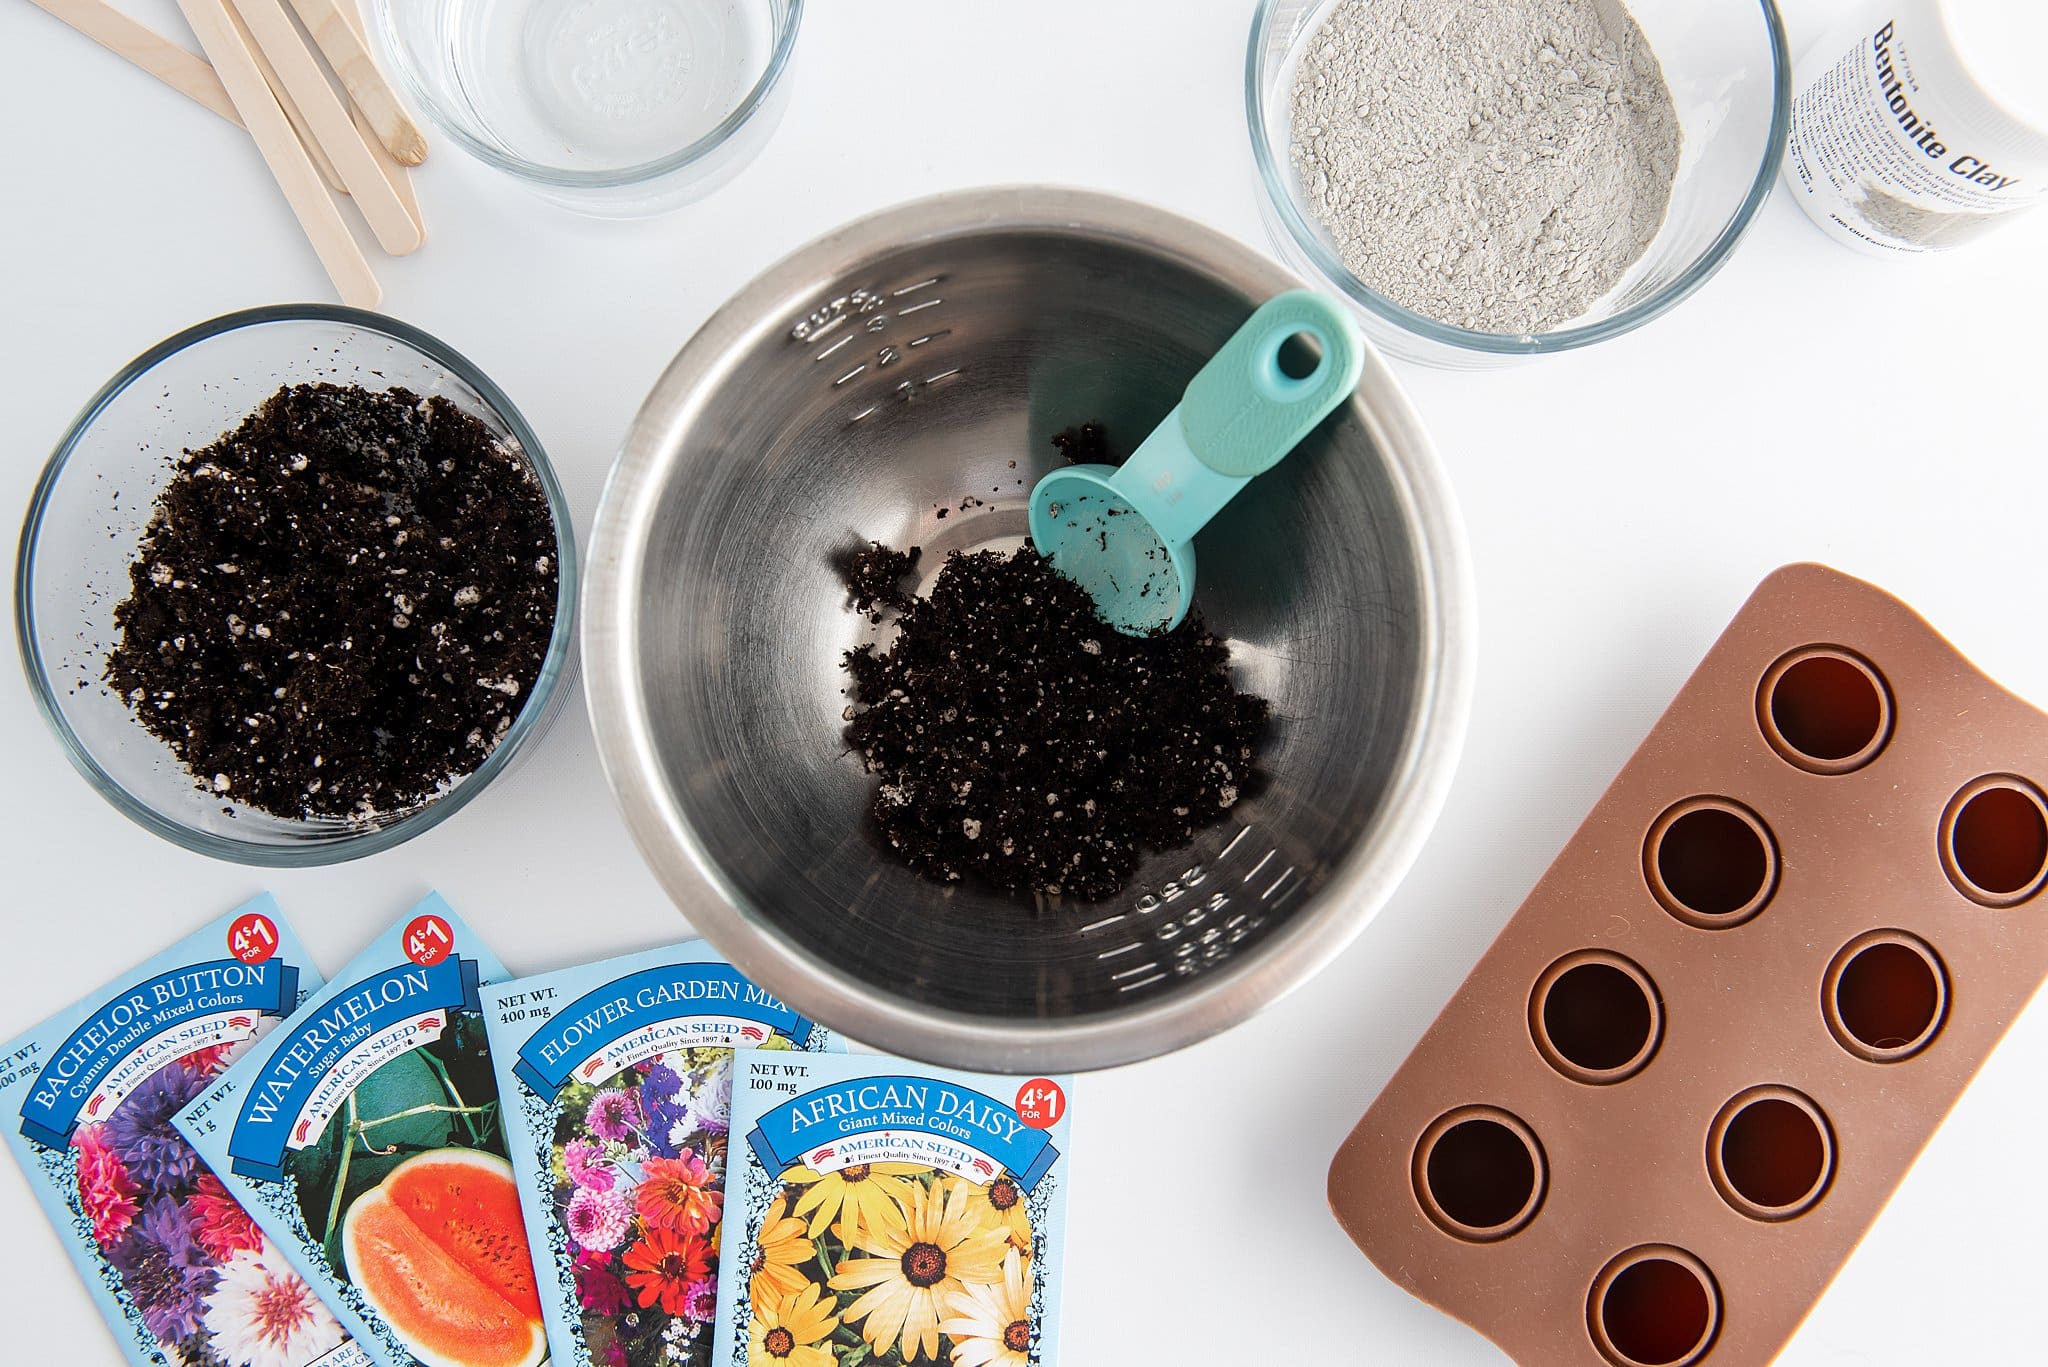
DIY Seed Pops Supplies
- packet of seeds (wildflowers work best)
- 1/2 soil or compost
- craft sticks
- 1/2 cup bentonite clay
- silicone mold (we used circular)
- tissue paper
- scissors
- pen
- tablespoon
- bowl
- ribbon or twine
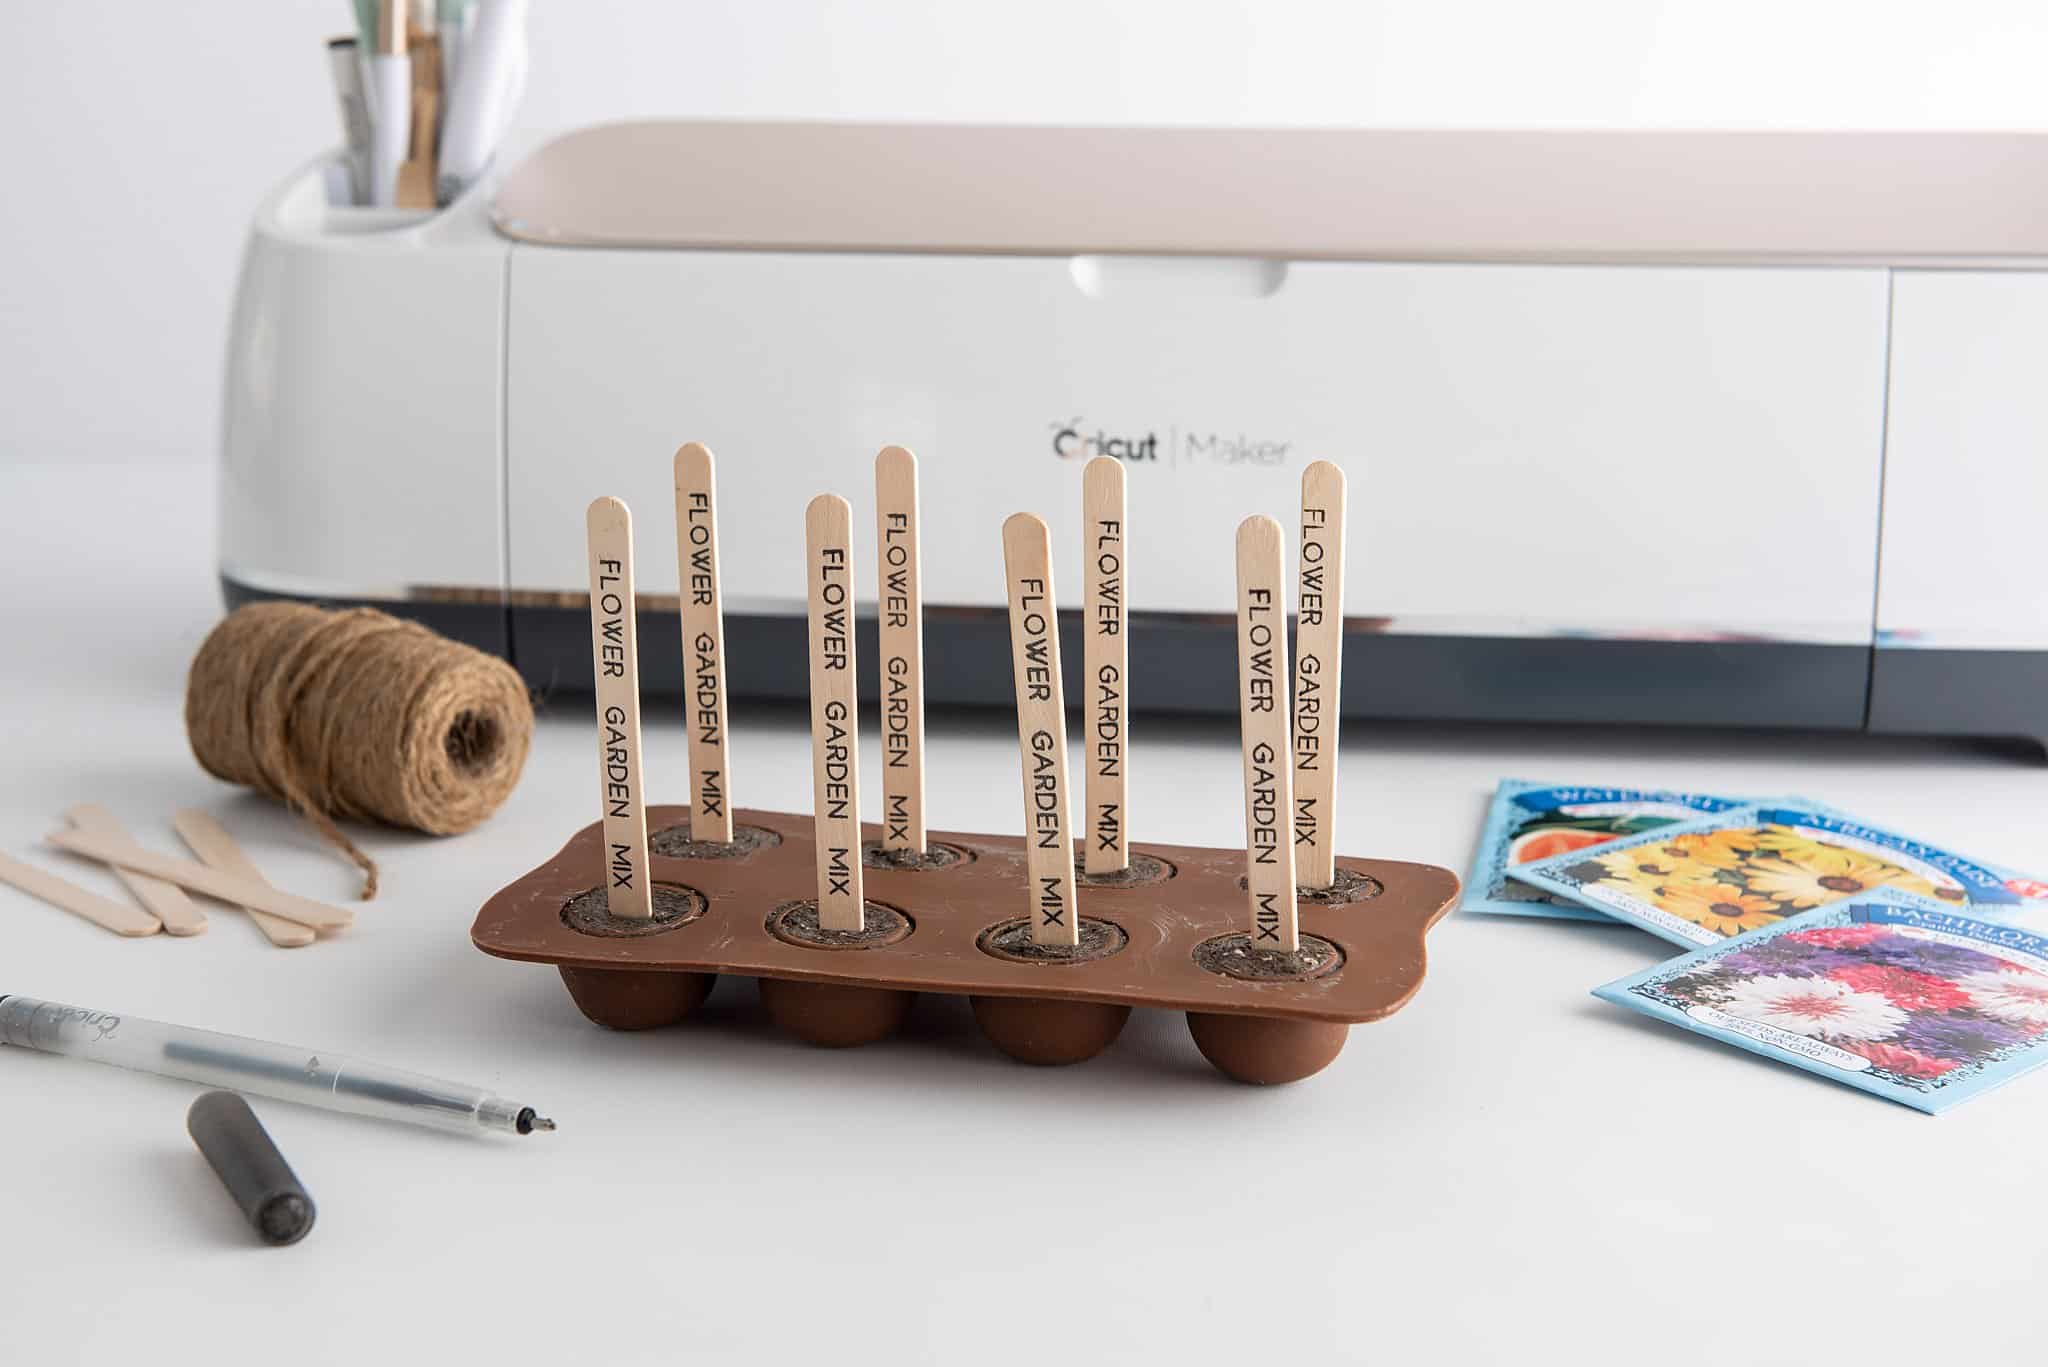
- optional: you can use a Cricut to do the lettering if you so choose, and you would need the Cricut machine, standard grip mat, painter’s tape, and a pen that is compatible with the Cricut
DIY Seed Bomb Favors Instructions
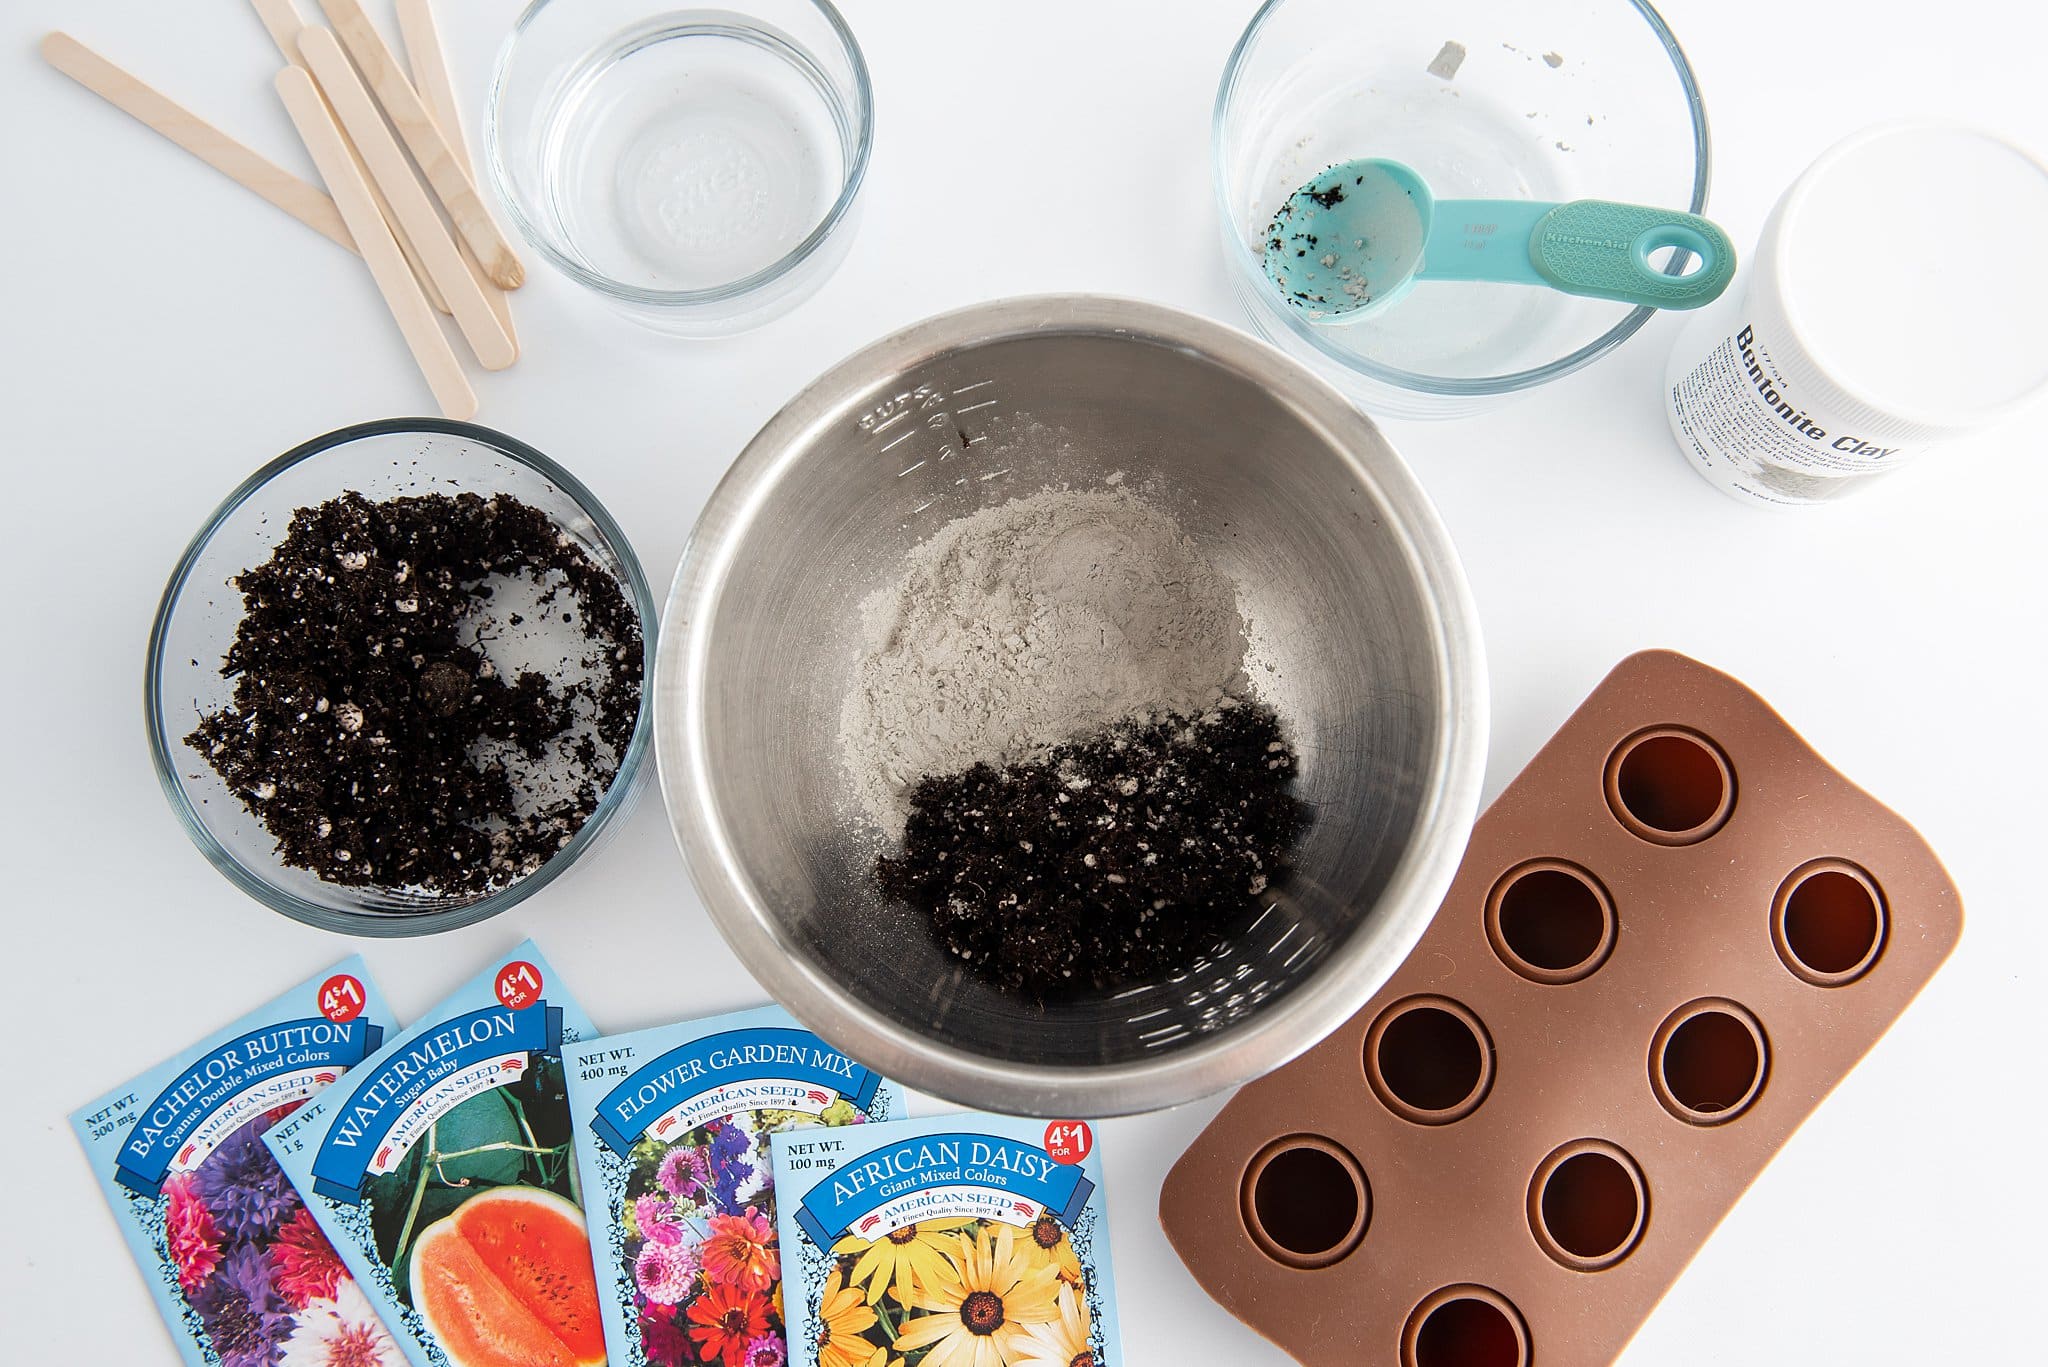
- Place soil (or compost) in a medium mixing bowl, and use one tablespoon per seed pop.
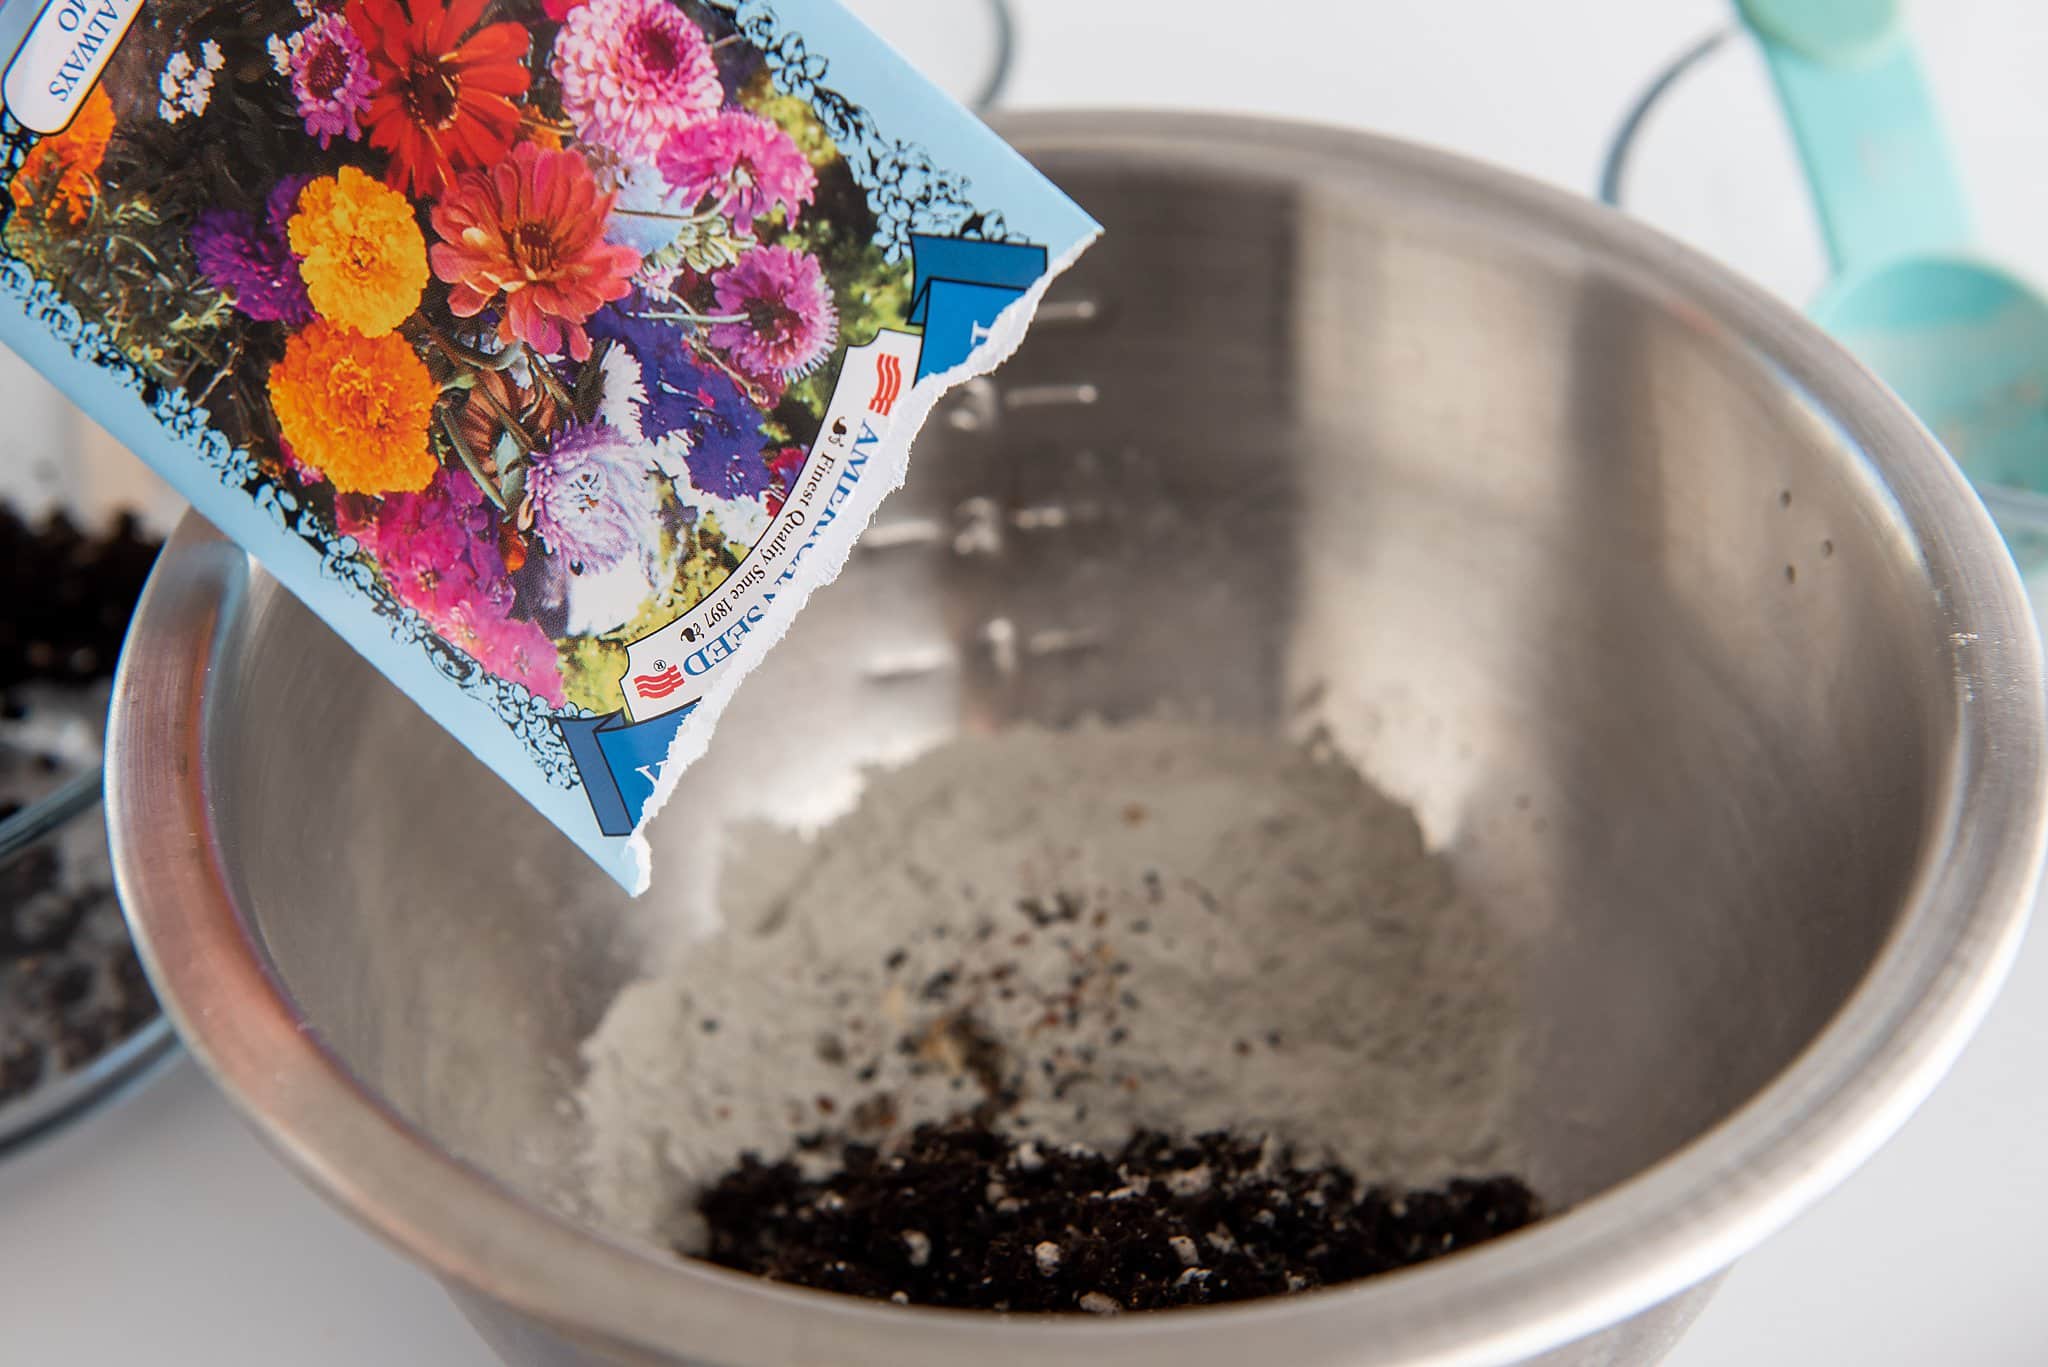
- In the same bowl, add the bentonite clay by tablespoon. It should be a 1:1 ratio, so one tablespoon of clay per seed bomb. The clay protects the seeds and will serve to hold the pop together.
- Add seeds to the soil/clay mixture. However, don’t overdo it as you don’t want to crowd out your plants as they grow. Depending on the type of plant, 4-6 seeds per pop is sufficient.
- Add water slowly to the seed mixture.
- Stir. It will be like putty or a play-doh mixture when you’ve added enough water.

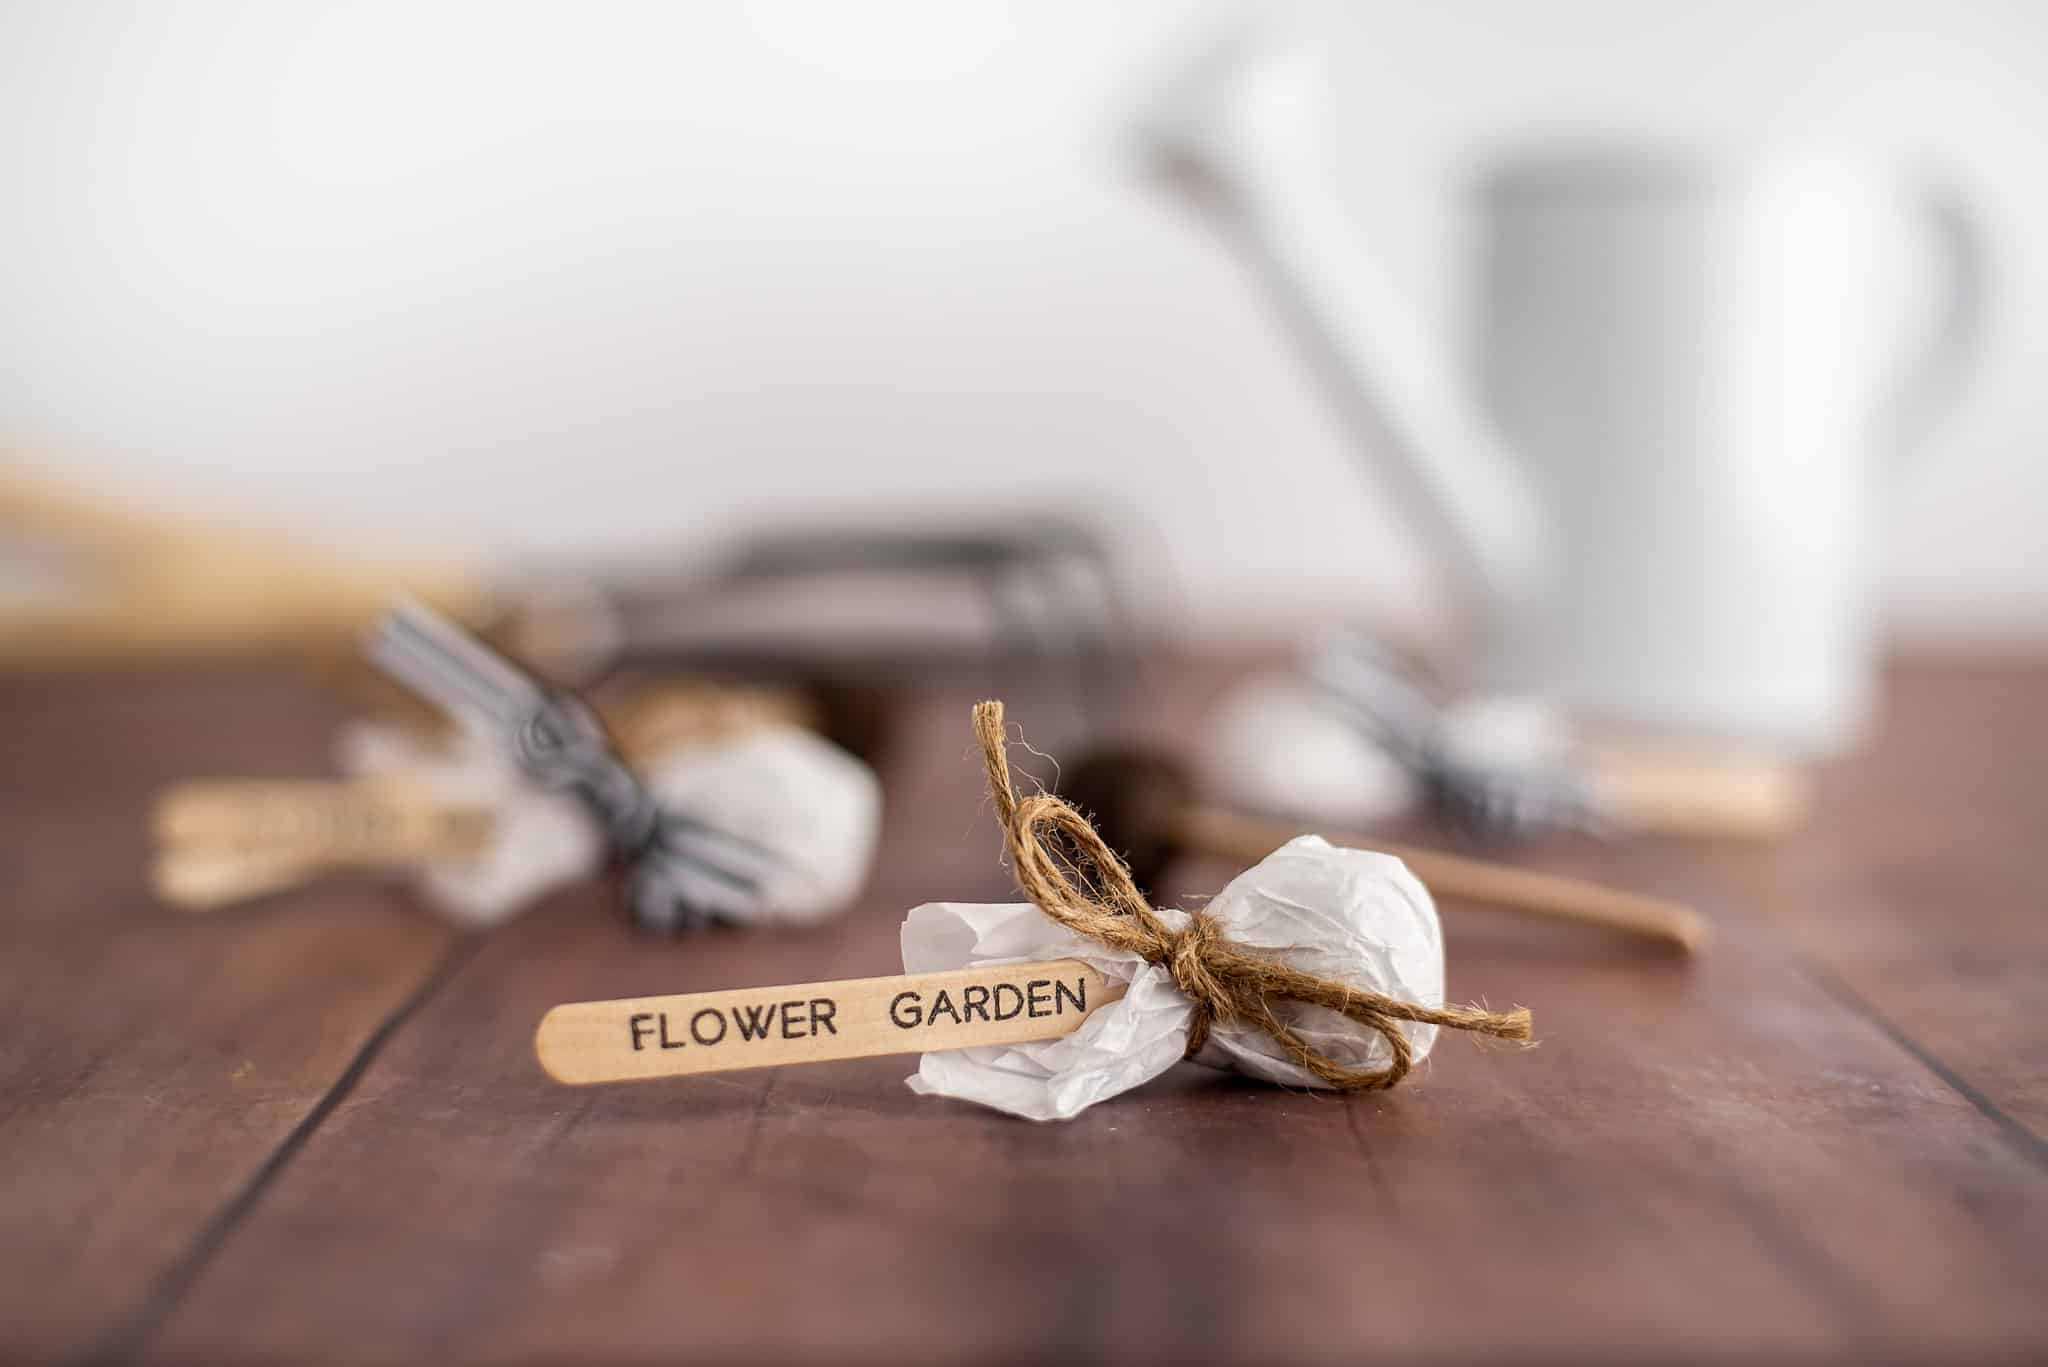
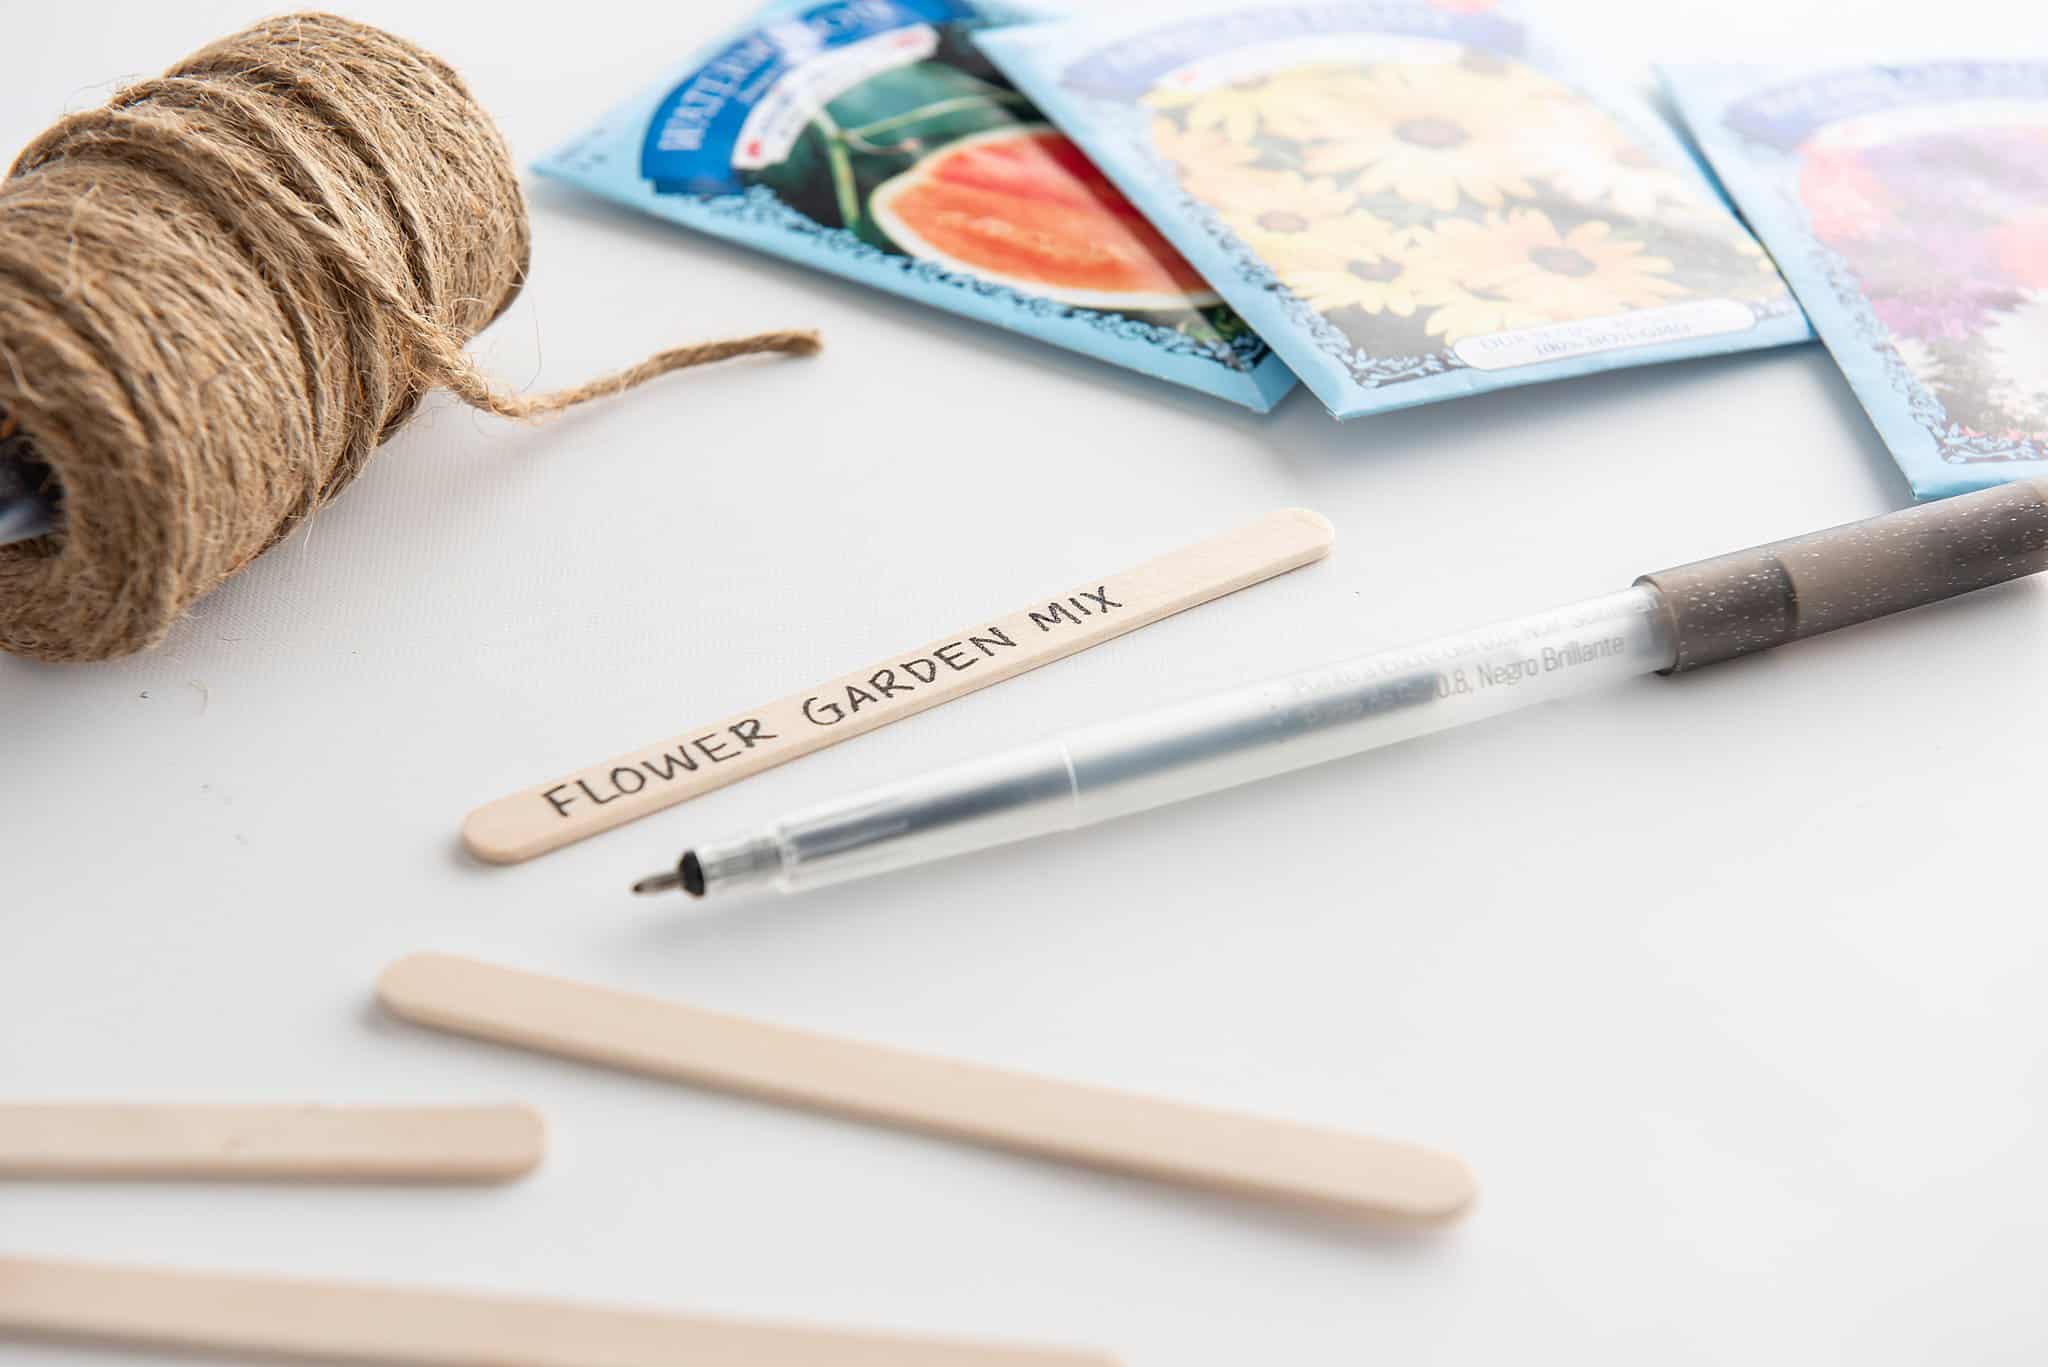
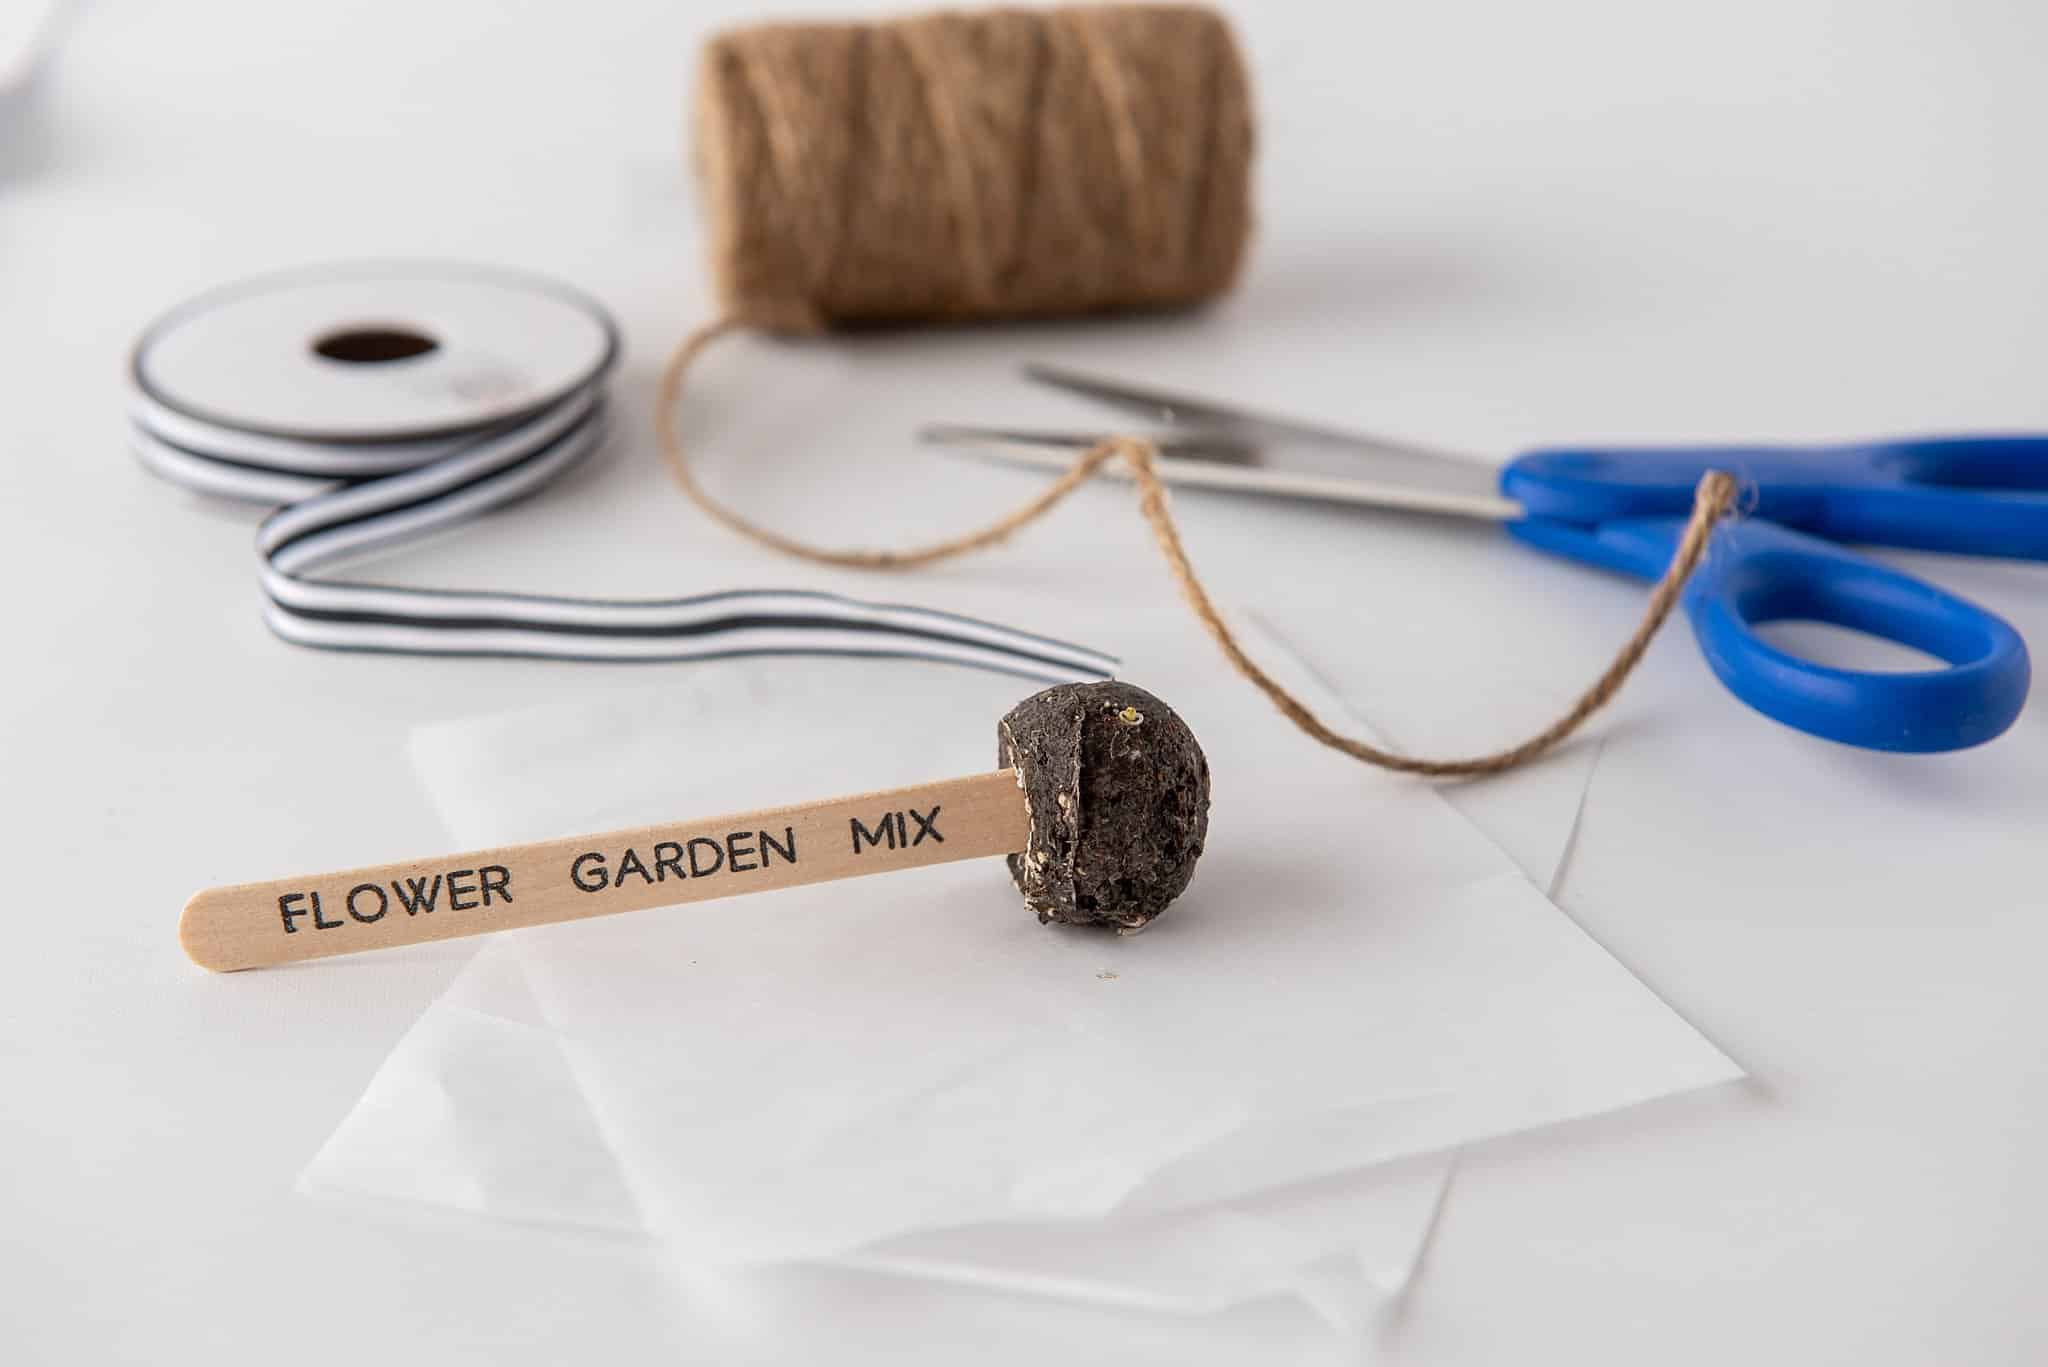
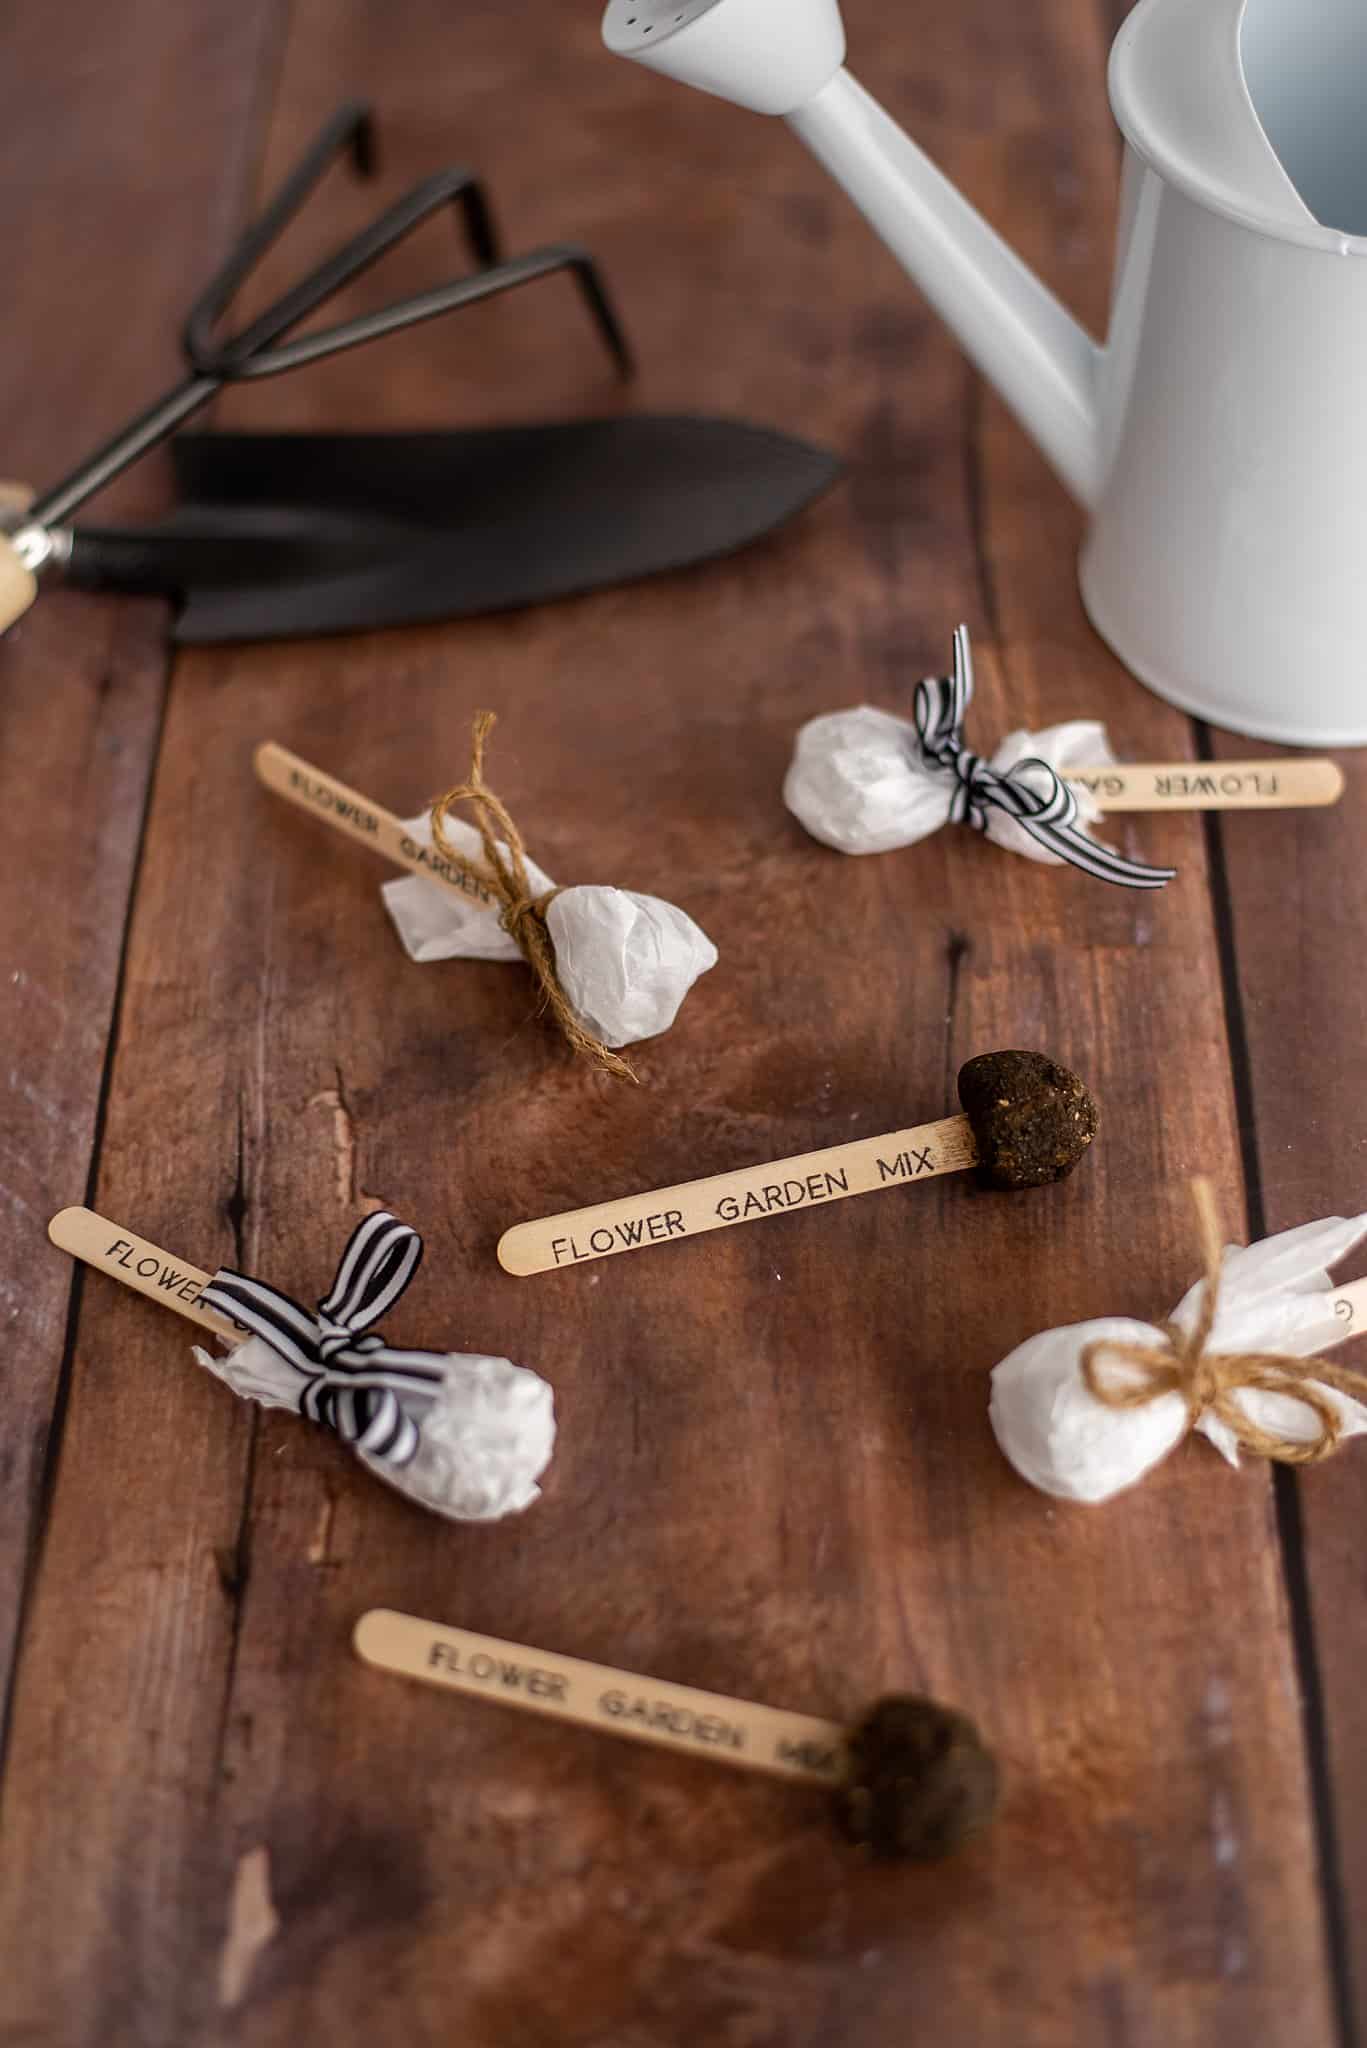
- Either use the Cricut to label the craft sticks, or hand-letter them. Next, you can either put “flower garden mix” or “wildflower mix” or a specific seed type, such as “marigolds.”
- Leave space (around 1/2″ to 1″) at the bottom of the stick. That way, it can be used as a marker for the seeds as they grow.
- Fill the silicone mold with the seed mixture. As a result, you can roll it into a ball before doing so or scoop it into the mold with a tablespoon.

- Level off the top of the mold after packing it well with the seed mixture.
- Insert one seed marker into each wildflower seed bomb.
- Let dry for 24-48 hours and remove from molds (be careful as they are fragile).
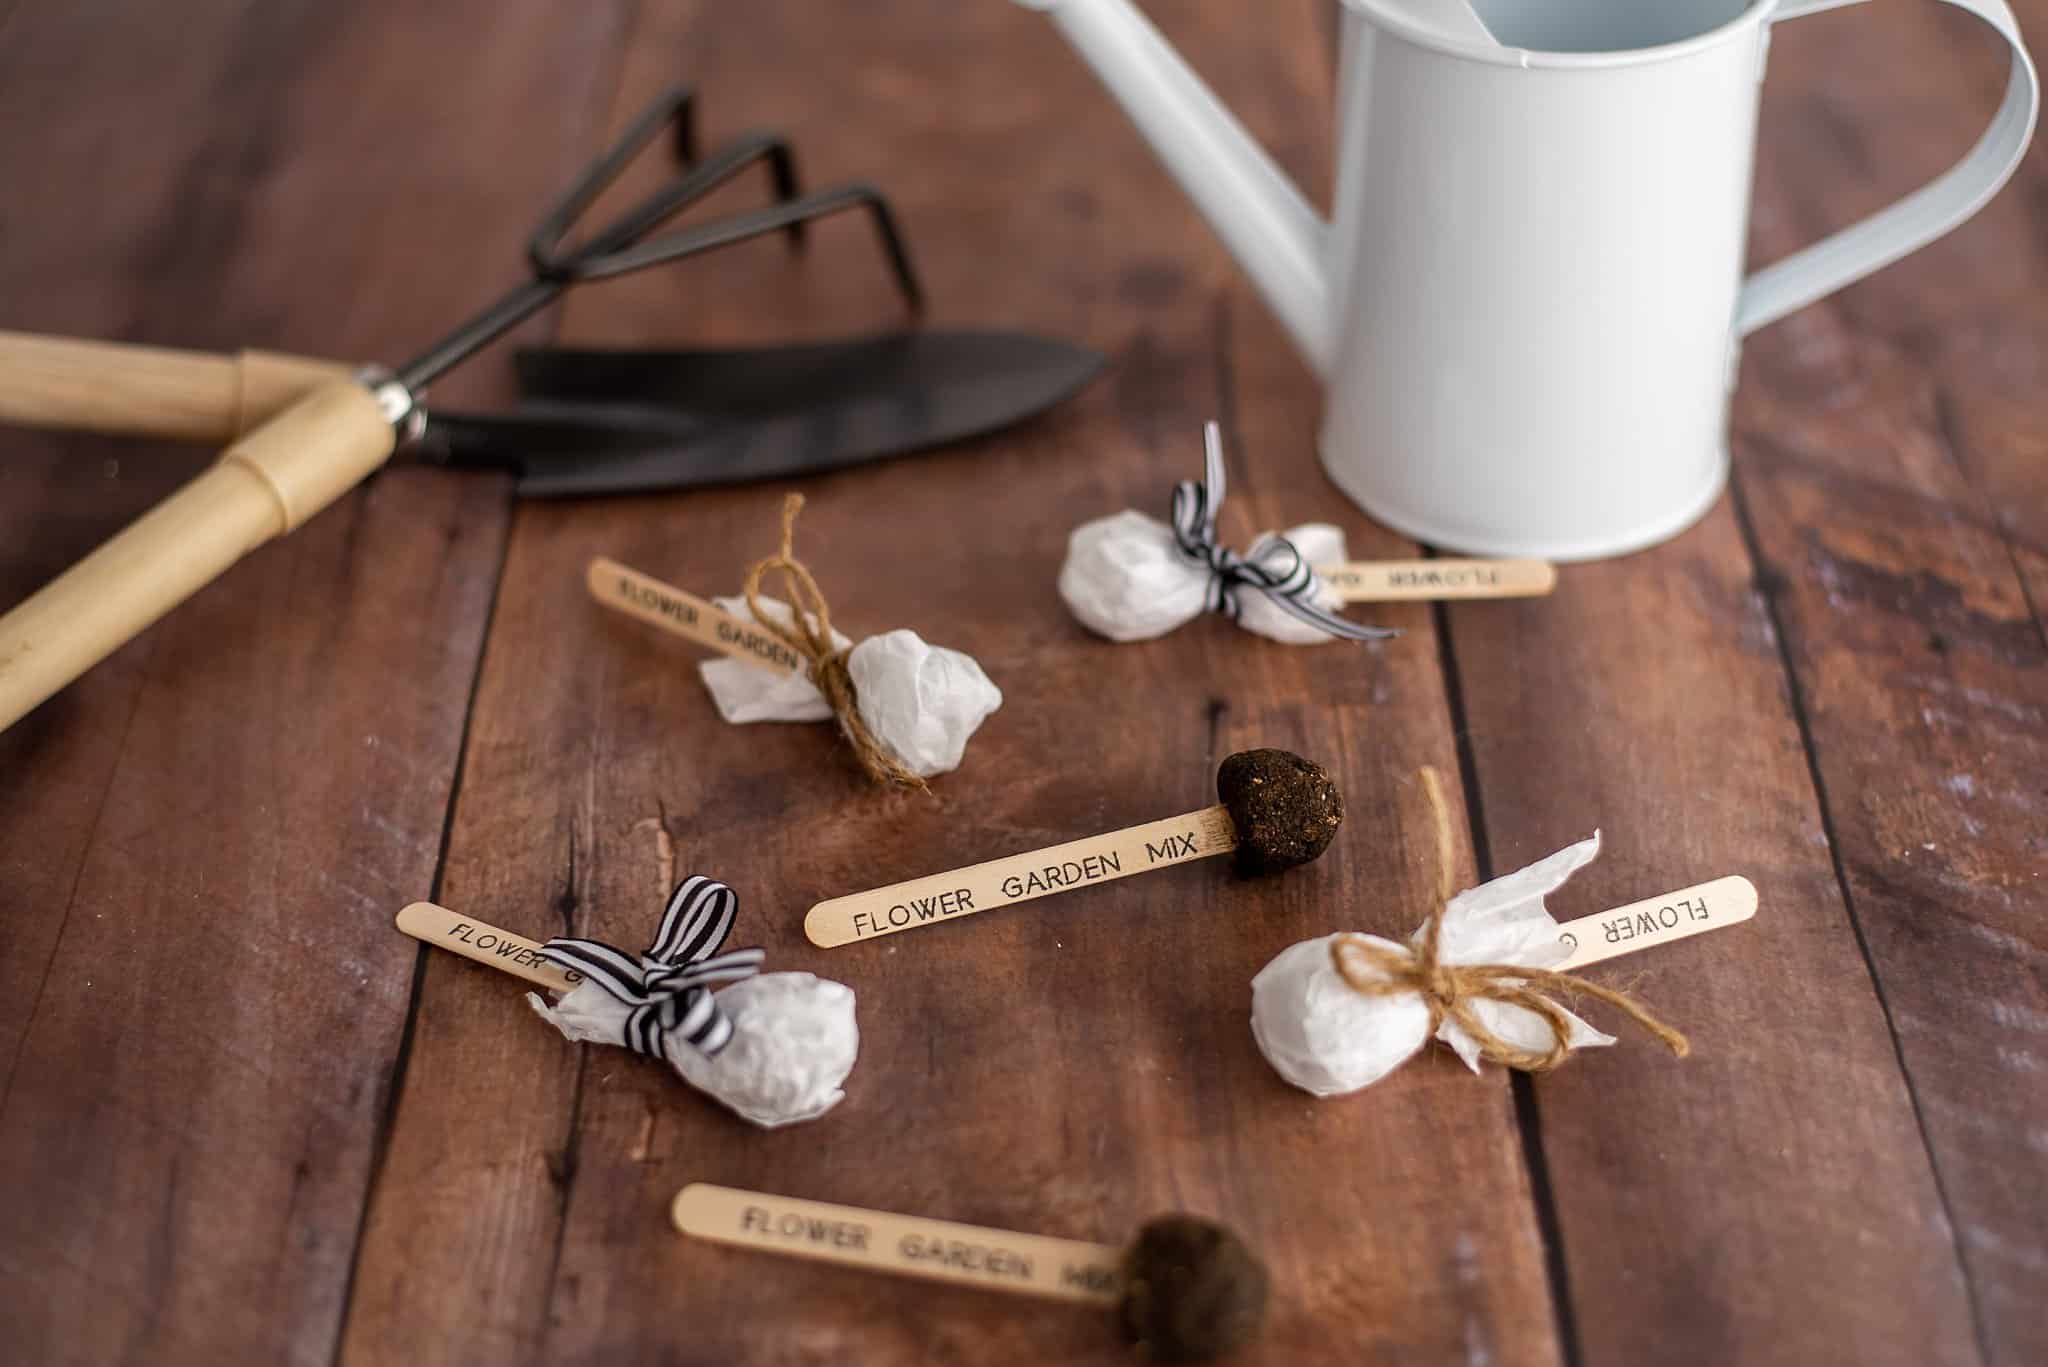
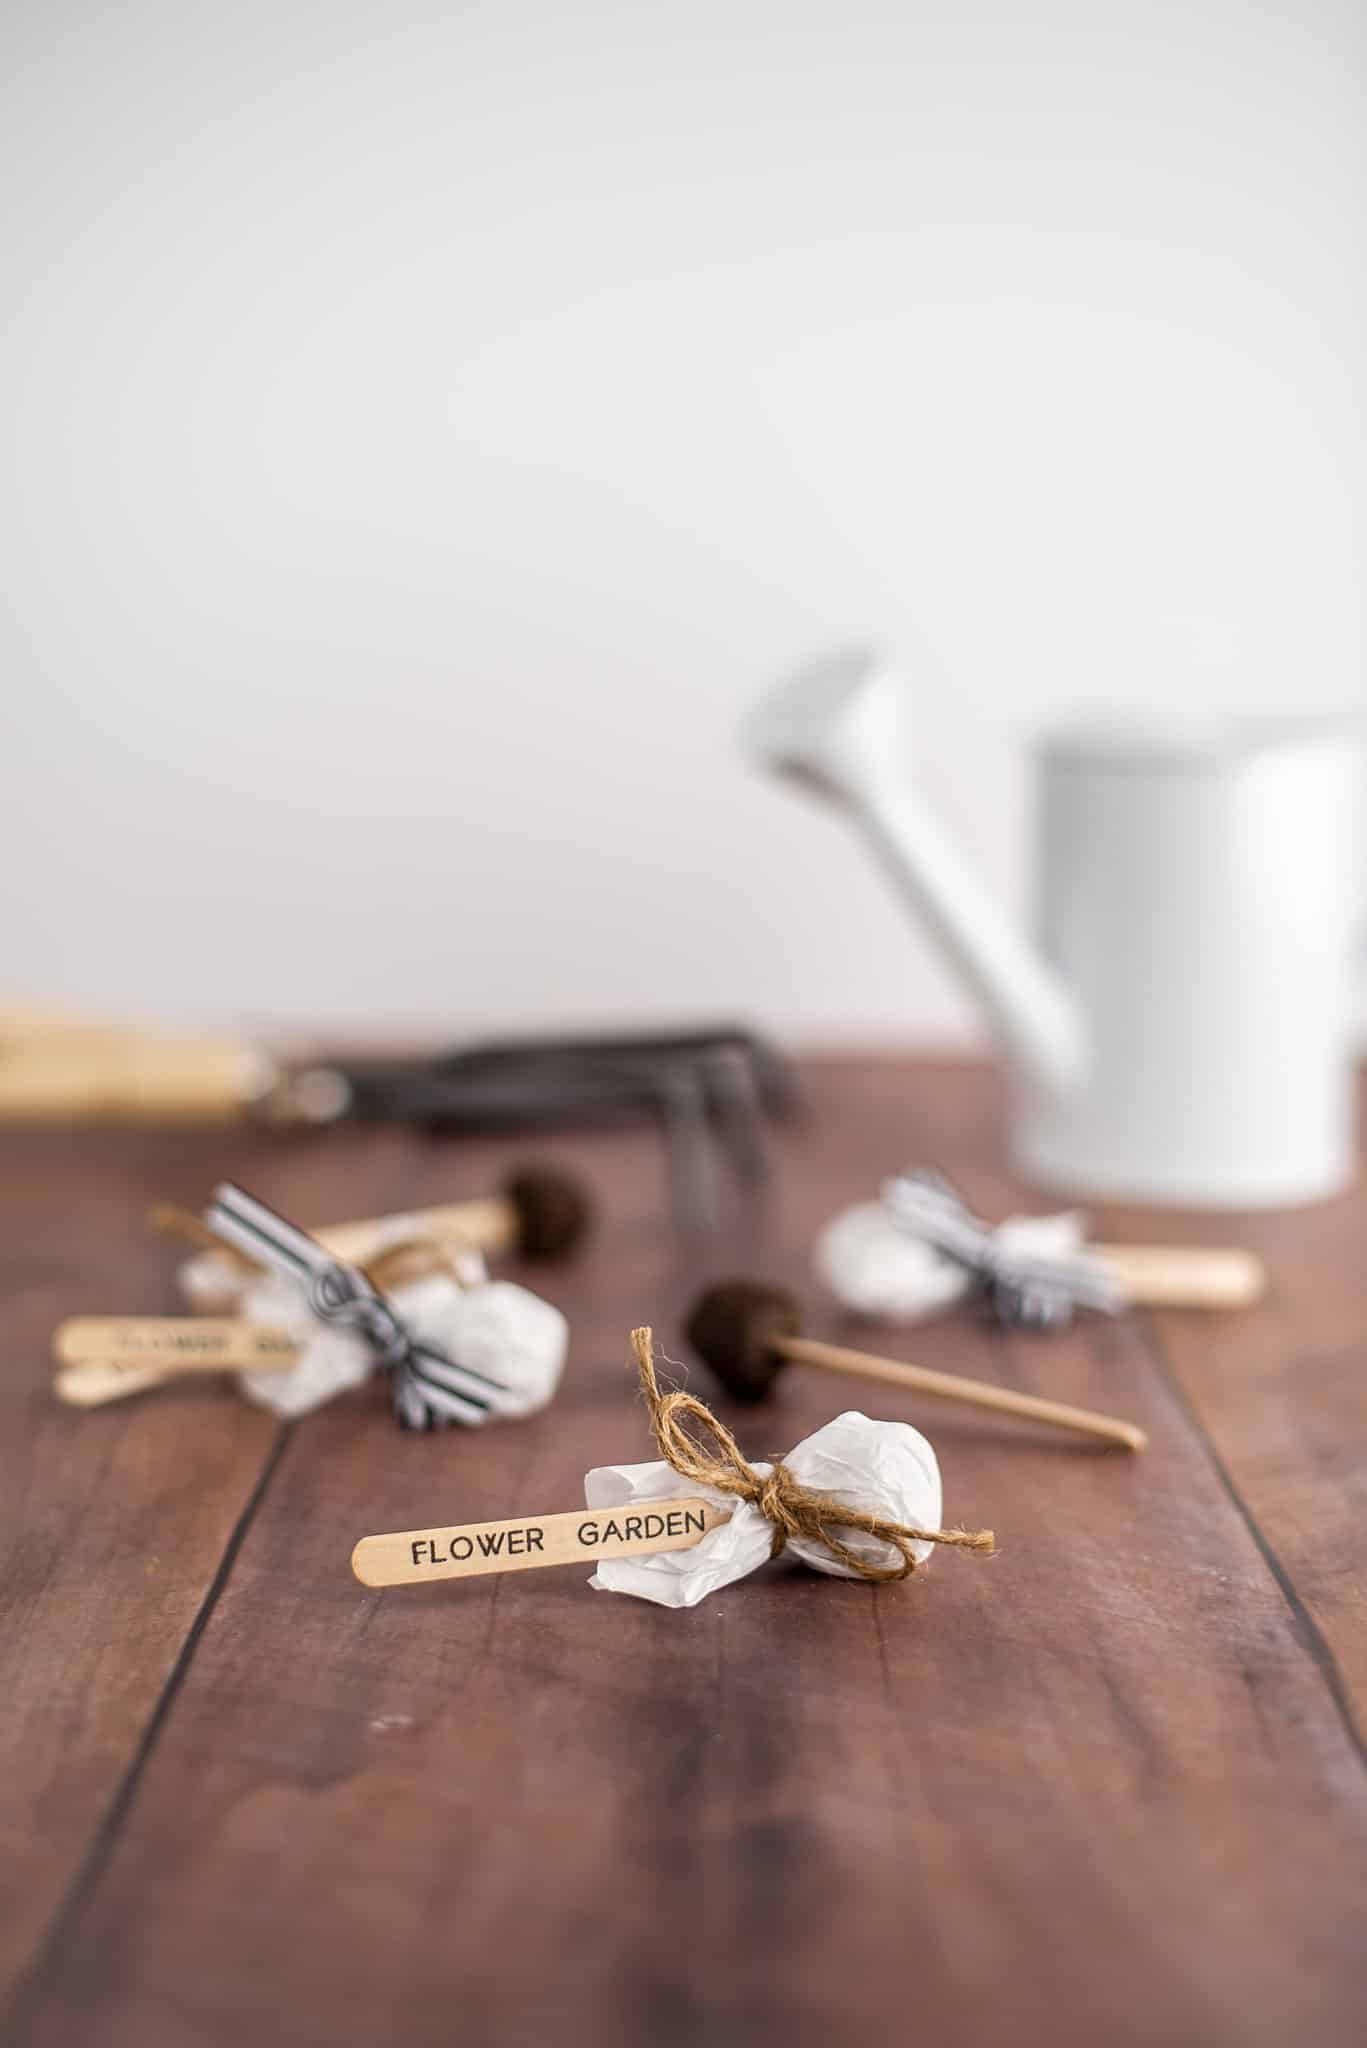
- Cut tissue paper into pieces to cover the head of each seed bomb.
- Secure the tissue with ribbon or twine.
How to Grow Seed Bombs
If you’re wondering how to use seed bombs and plant them, they are fairly foolproof. Consequently, just like any seeds, they will need more soil, water, and light (eventually). Again, you will need to add specific seed bombs planting instructions to your favors.
It’s recommended that you place the entire pop into well-watered soil. Next, use the stick to “swirl” the bomb around a bit in the top of the soil. That way, the seeds will be spread out a bit and thrive. Finally, water twice weekly and weed out any plants that are too close together.
Additionally, you can also pull out plants that aren’t thriving. Hopefully, your DIY seed pops will turn into gorgeous, healthy plants!
DIY Seed Pops Ready for Gifting

Want to make DIY seed bomb favors with wildflowers? Save it!