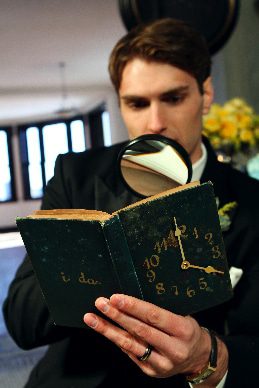
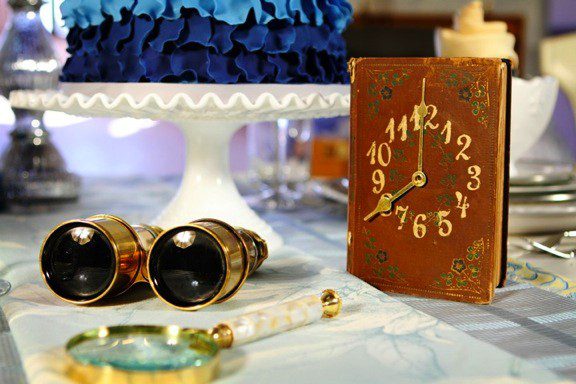
DIY projects are all the rage nowadays, so of course we decided to incorporate one into our Secret of the Seven Hills photo shoot in photos here by Stone Blue Productions. This one utilizes vintage books for table numbers, which turn into quite the beautiful keepsake! Many thanks to Lauren for designing this spectacularly beautiful book clock table number project for our brides. Look for the full spread of photos on page 27 of clutch, the bride’s guide to have and to hold. Oh, and the adorable couple in the DIY photos is none other than our intern, Lauren, herself with her beau, Jared! So cute. This post also contains affiliate links, which help to keep our blog going while also making things easy for you to purchase.
The book clock table number photos were taken by Lauren Mosett, our intern. Enjoy!
Step 1: Buy a vintage book at an antique/thrift store or here via Etsy. The price depends; we got ours for $4.
Step 2: Now trace the outline of a circle onto the center of the front cover as a reference guide for where your numbers will be. Do this with a pencil so you can erase the marks afterwards. To create a perfect circle use a cup or bowl that matches the size circle you need.

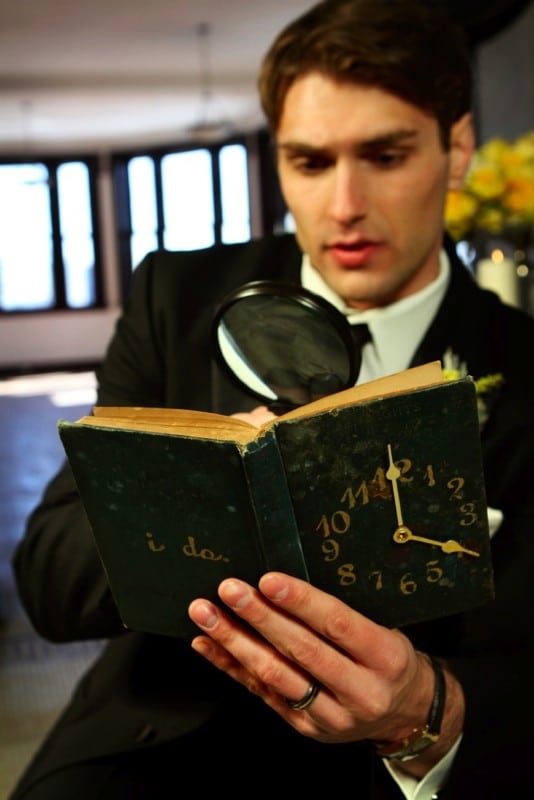
Step 3: Mark with a pencil where you want the numbers to be. Use the dabber to evenly distribute ink onto the number stamps you bought, and very carefully stamp them onto the book cover. Or just purchase clock numbers here.
Step 4: Once the numbers are dry, erase the pencil markings from the cover.

Step 5: For an extra cute factor, use the same color ink and stamp the words ‘I do’ onto either the back cover or the front page. Another option is stamping the groom and bride’s names or last name. If you don’t want to use words, get a pretty wildflower stamp or something of your preference to decorate the back cover. There is freedom in this project to personalize the book however you like.


Step 6: Use the black photo corners and adhere them to the front inside cover and back inside cover. Then place photos of the bride and groom in them to personalize it even more. You will want to measure the pictures and properly mark the book before adhering the corners.
Step 7: Glue some of the first 10 pages together so that when you set the book upright, the pages will not spread out so much but stay put so the wedding guests can view the pictures and stamp work.
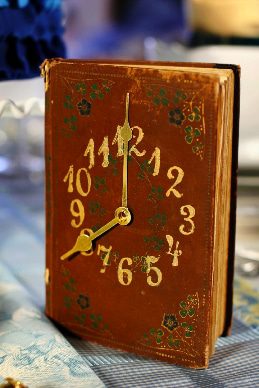
Step 8: Measure the center part of the clock face and mark it with a pencil. Very carefully put a small dot of super glue on your mark and press down the bigger of the two clock hands. After, super glue as necessary to adhere the shorter hand. Press down firmly until dry.

Now set the book clock table number upright and admire your handiwork!
Again, for purchasing information, check here:
- Books
- Clock hands
- Number stamps
- Ink dabber in gold
- Clock numbers (if you don’t want to use stamps)
What a darling project! Feel free to set different times for each table… Table 1:00, Table 1:30 and so on depending on how many tables you have. I love this idea, which provides uniqueness for any wedding… especially one themed with books or clocks. Enjoy, and thank you again, Lauren!